¶ Overview

MicroBlocks WIFI Library supports many microcontroller boards that are WIFI capable. With a few simple blocks, it is no effort to setup a WIFI connection to participate on the local IP infrastructure; or even create a hotspot based network.
This library forms the basis for more advanced WIFI-based applications where one of the many IP protocols are used to build applications; eg: WebSocket, UDP, HTTP, MQTT etc. There are separate libraries and examples provided on how to accomplish these.
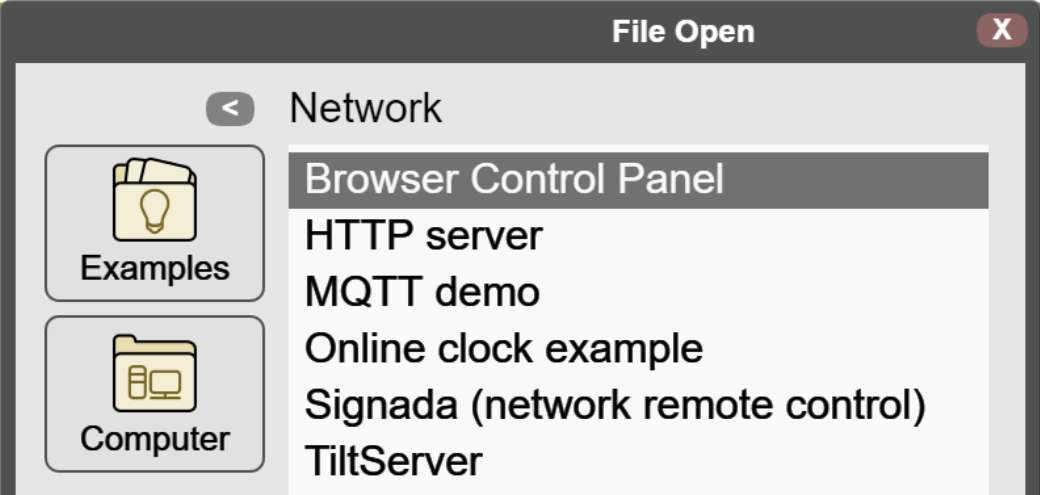
For some examples of WIFI projects, refer to the WIFI Remote Control Methods article in our WIKI. You can also try out one of the examples provided in the File / Open /Examples / Network menu of the IDE:
¶ Summary of Blocks
For each block, there is a short description entry and a detailed block and component description. You can click on block pictures in the short description table to access the details and sample codes.
Sample codes on how to use the blocks have been provided. To try them out, all you have to do is open a browser session of the MicroBlocks IDE and drag and drop them onto the editor programming area. Then you can just click on them and see the results.
To test any of the sample codes below, just drag and drop them onto the MicroBlocks IDE.
¶ Working with Library Blocks
WebSocket Library has two distinct types of block shapes:
-
oval: these are reporter blocks that return some kind of information back. The user would normally either assign these to a project variable or use it in a suitable input slot of other blocks.
-
rectangular: these are command blocks that perform a programmed function and do not return any information.
¶ Block Descriptions
These library blocks will only work with microcontroller boards that are WIFI-capable; eg: ESP8266 and ESP32 family, PICO2040, etc.
Please make sure you use WIFI credentials specific to your network environment.
The ones used here are for example purposes and WILL NOT WORK.
¶ WIFI connect to
![]()
This block is used to signon to the local IP network with the credentials provided. When the signon process is completed, an IP adress is obtained from the local router.
¶ Sample Code
This example demonstrates connecting to the local WIFI network. WIFI credentials are displayed.
Remember to substitute your own SSID and PASSWORD values.
![]()
¶ WIFI create hotspot

If there is no IP network available in the nearby vicinity, it is possible to have the microcontroller create a hotspot to provide this access service. In this case, the microcontroller acts as an access point (AP) just like the router does in the normal WIFI network example. Once the hotspot is established, all the remote devices can connect to it and obtain their IP addresses directly from the hotspot device.
Make sure that the password you use is of the type STRING and it is minimally 8 characters in length. At least in the Windows environments, the OS will not allow the creation of "no password" hotspots (open access hotspots). See script picture below on how to verify password variable type:
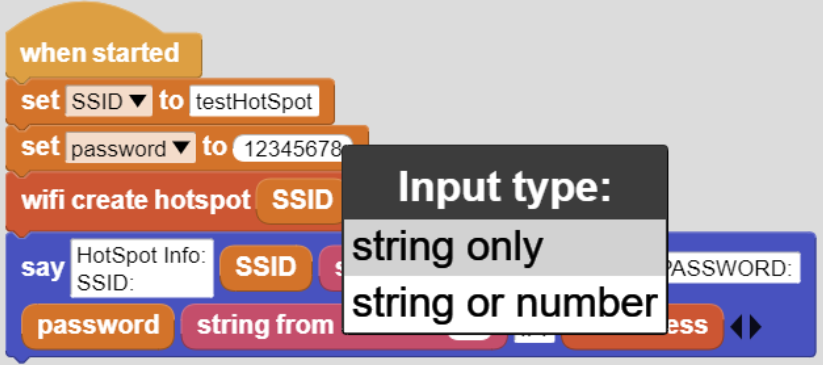
When you select string only in the dropdown menu, the field will change from an oval white to a rectangular white. See example below.
Note that under normal circumstances, the hotspot DOES NOT provide Internet access.
It is only a means for the local devices to communicate with each other.
¶ Sample Code
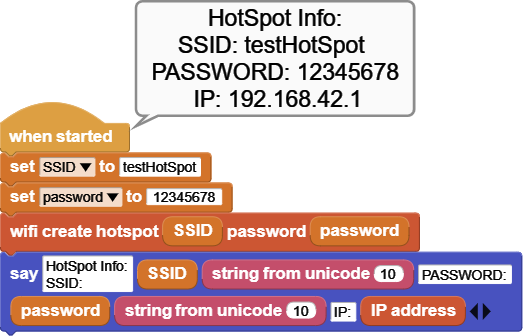
In this example, we program the microcontroller to create a hotspot with the given credentials. Hotspot details are displayed upon successful completion of the hotspot startup.
Please note that in this mode of operation, there is no Internet access possible under normal circumstances. Also, the IP address range assigned by the hotspot will be a different range than what is assigned by your Internet Router.
¶ IP address

From Wikipedia, the free encyclopedia
An Internet Protocol address (IP address) is a numerical label such as 192.0.2.1 that is connected to a computer network that uses the Internet Protocol for communication. An IP address serves two main functions: network interface identification, and location addressing.Internet Protocol version 4 (IPv4) defines an IP address as a 32-bit number. However, because of the growth of the Internet and the depletion of available IPv4 addresses, a new version of IP (IPv6), using 128 bits for the IP address, was standardized in 1998. IPv6 deployment has been ongoing since the mid-2000s.
IP addresses are written and displayed in human-readable notations, such as 192.0.2.1 in IPv4, and 2001:db8:0:123:0:567:8:1 in IPv6.
The size of the routing prefix of the address is designated in CIDR notation by suffixing the address with the number of significant bits, e.g., 192.0.2.1/24, which is equivalent to the historically used subnet mask 255.255.255.0.
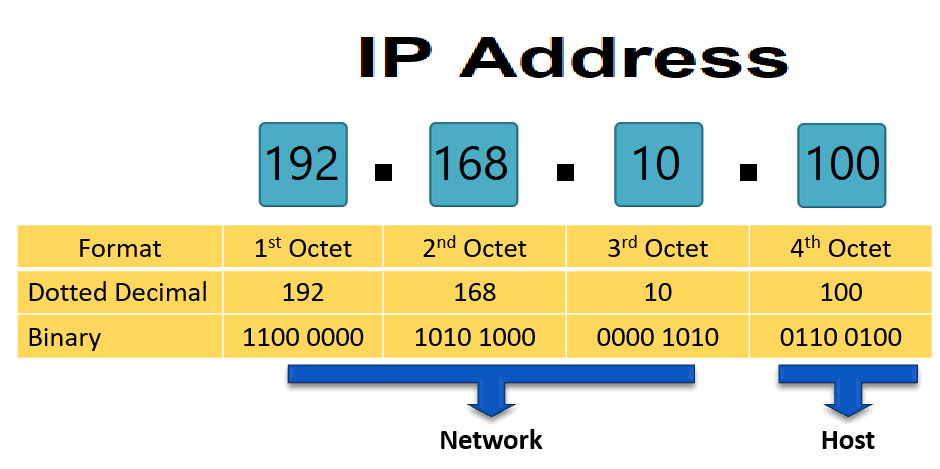
When a successfull connection is established between the microcontroller device and the internet router, or a hotspot is started; an IP address is assigned.
In the case of the normal Internet connectivity, this is the address assigned by the DHCP of the Internet router. In the case of the hotspot, the address is assigned by the microcontroller device.
¶ Sample Code
This is not a complete program, but rather a block result showing the assigned IP address.

¶ MAC address

From Wikipedia, the free encyclopedia
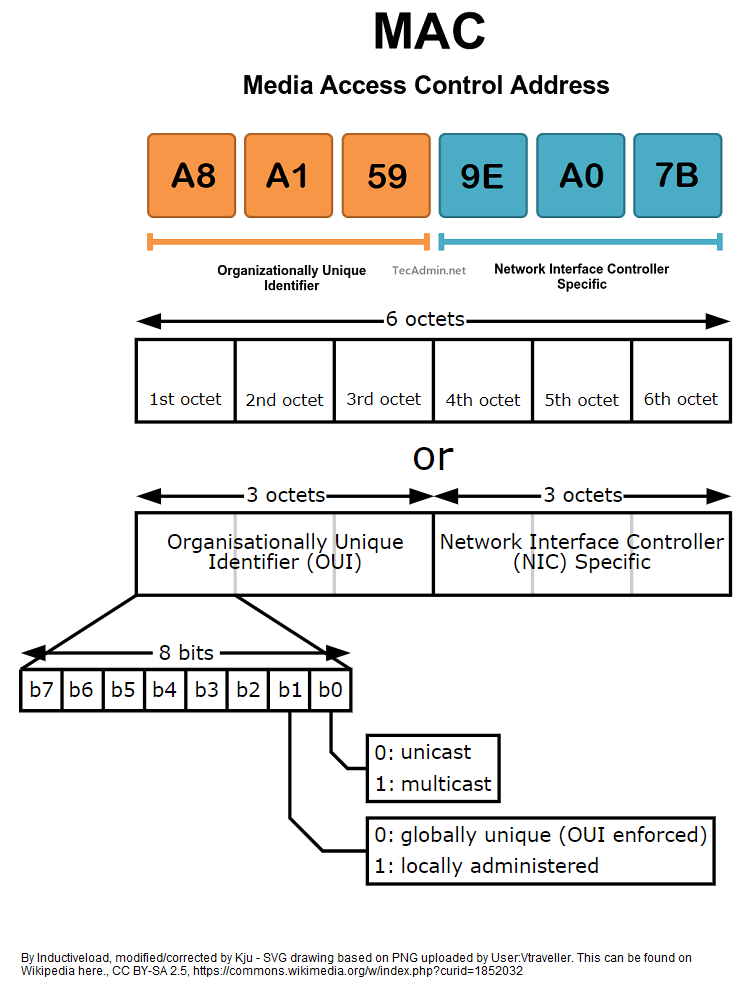
A media access control address (MAC address) is a unique identifier assigned to a network interface controller (NIC) for use as a network address in communications within a network segment. This use is common in most IEEE 802 networking technologies, including Ethernet, Wi-Fi, and Bluetooth. As typically represented, MAC addresses are recognizable as six groups of two hexadecimal digits, separated by hyphens, colons, or without a separator.
¶ Sample Code
This is not a complete program, but rather a block result showing the MAC address of the WIFI device.

¶ allow WIFI while using BLE

For the boards that have both WIFI and BLE functionality supported in MicroBlocks, it enables control of simultaneous use of these, based on the boolean switch setting.
MicroBlocks IDE supports BLE connectivity, to be able to edit the code wirelessly. One can combine this with the board's WIFI feature if needed.
¶ WIFI Traffic Related Info:
WIFI devices attempting to communicate are subject to several restrictions imposed by the Internet Router used and local traffic profiles:
- The configuration of the Internet Routers may restrict the number of devices allowed to connect, by restricting the DHCP address ranges. While a typical class-C range is 255 addresses, the actual feasible numbers (10-20) are way below that.
- Router configurations permit setting the channel number to be used for the communication; as well as do it automatically if so configured.
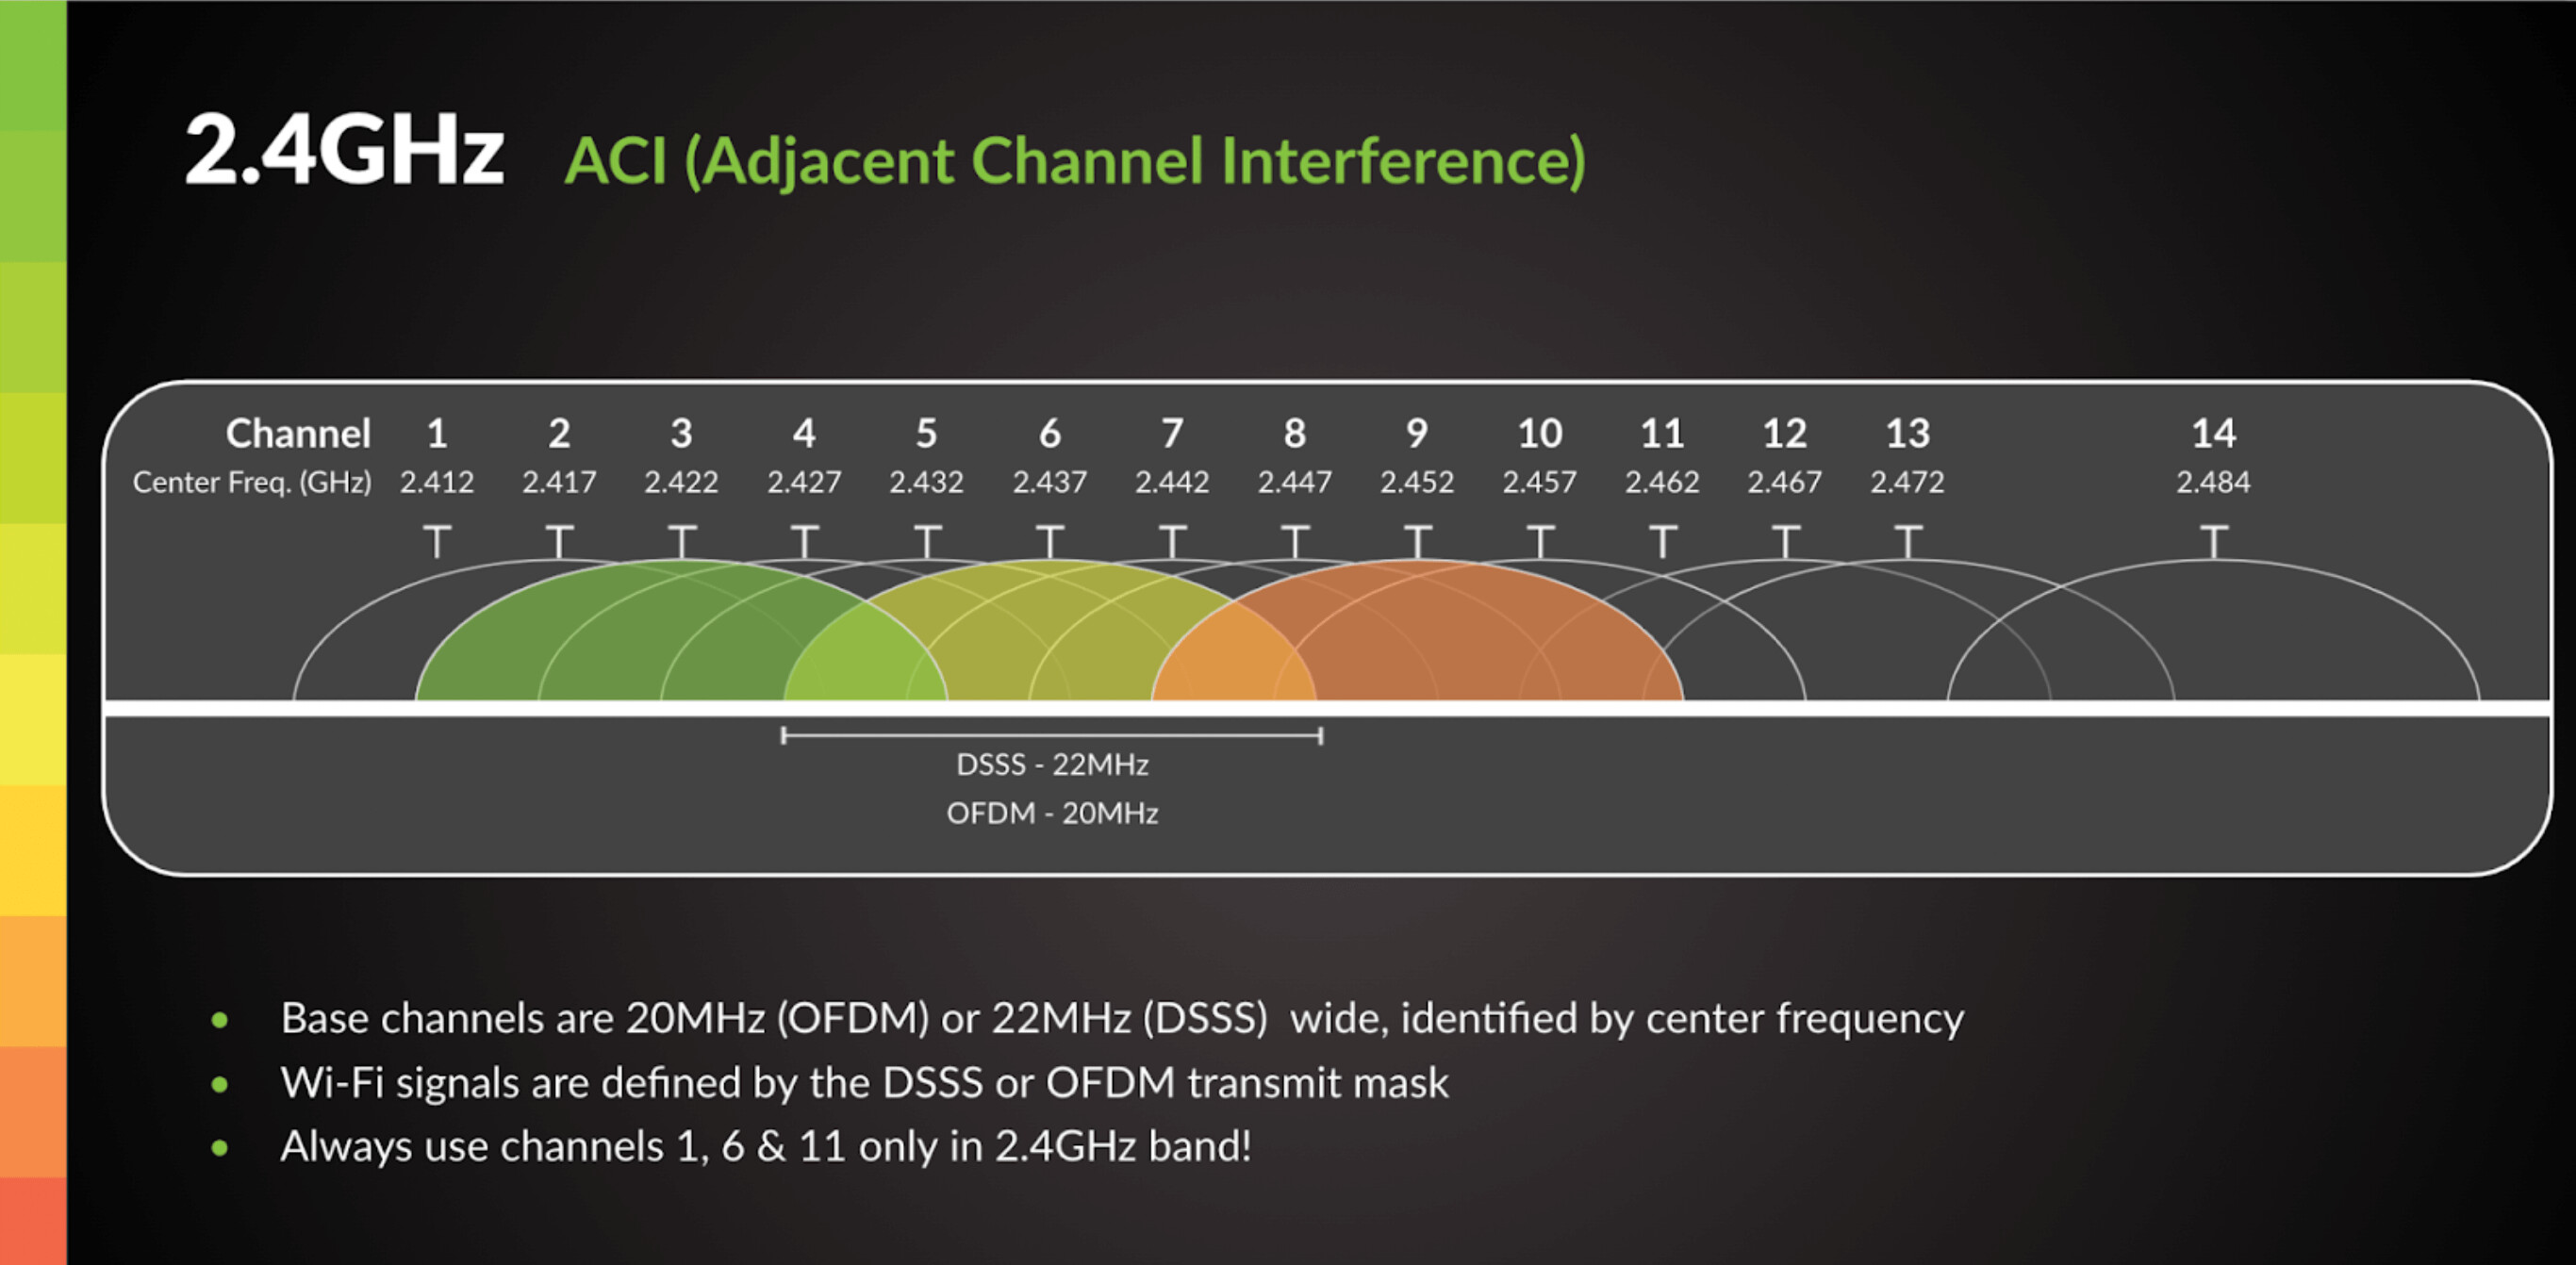
For 2.4GHz, channel numbers range 0-14 and are spaced 5 MHz apart from each other except for a 12 MHz space before channel 14. This arrangement is such that several of the channels overlap each other, as shown in the pictures below.
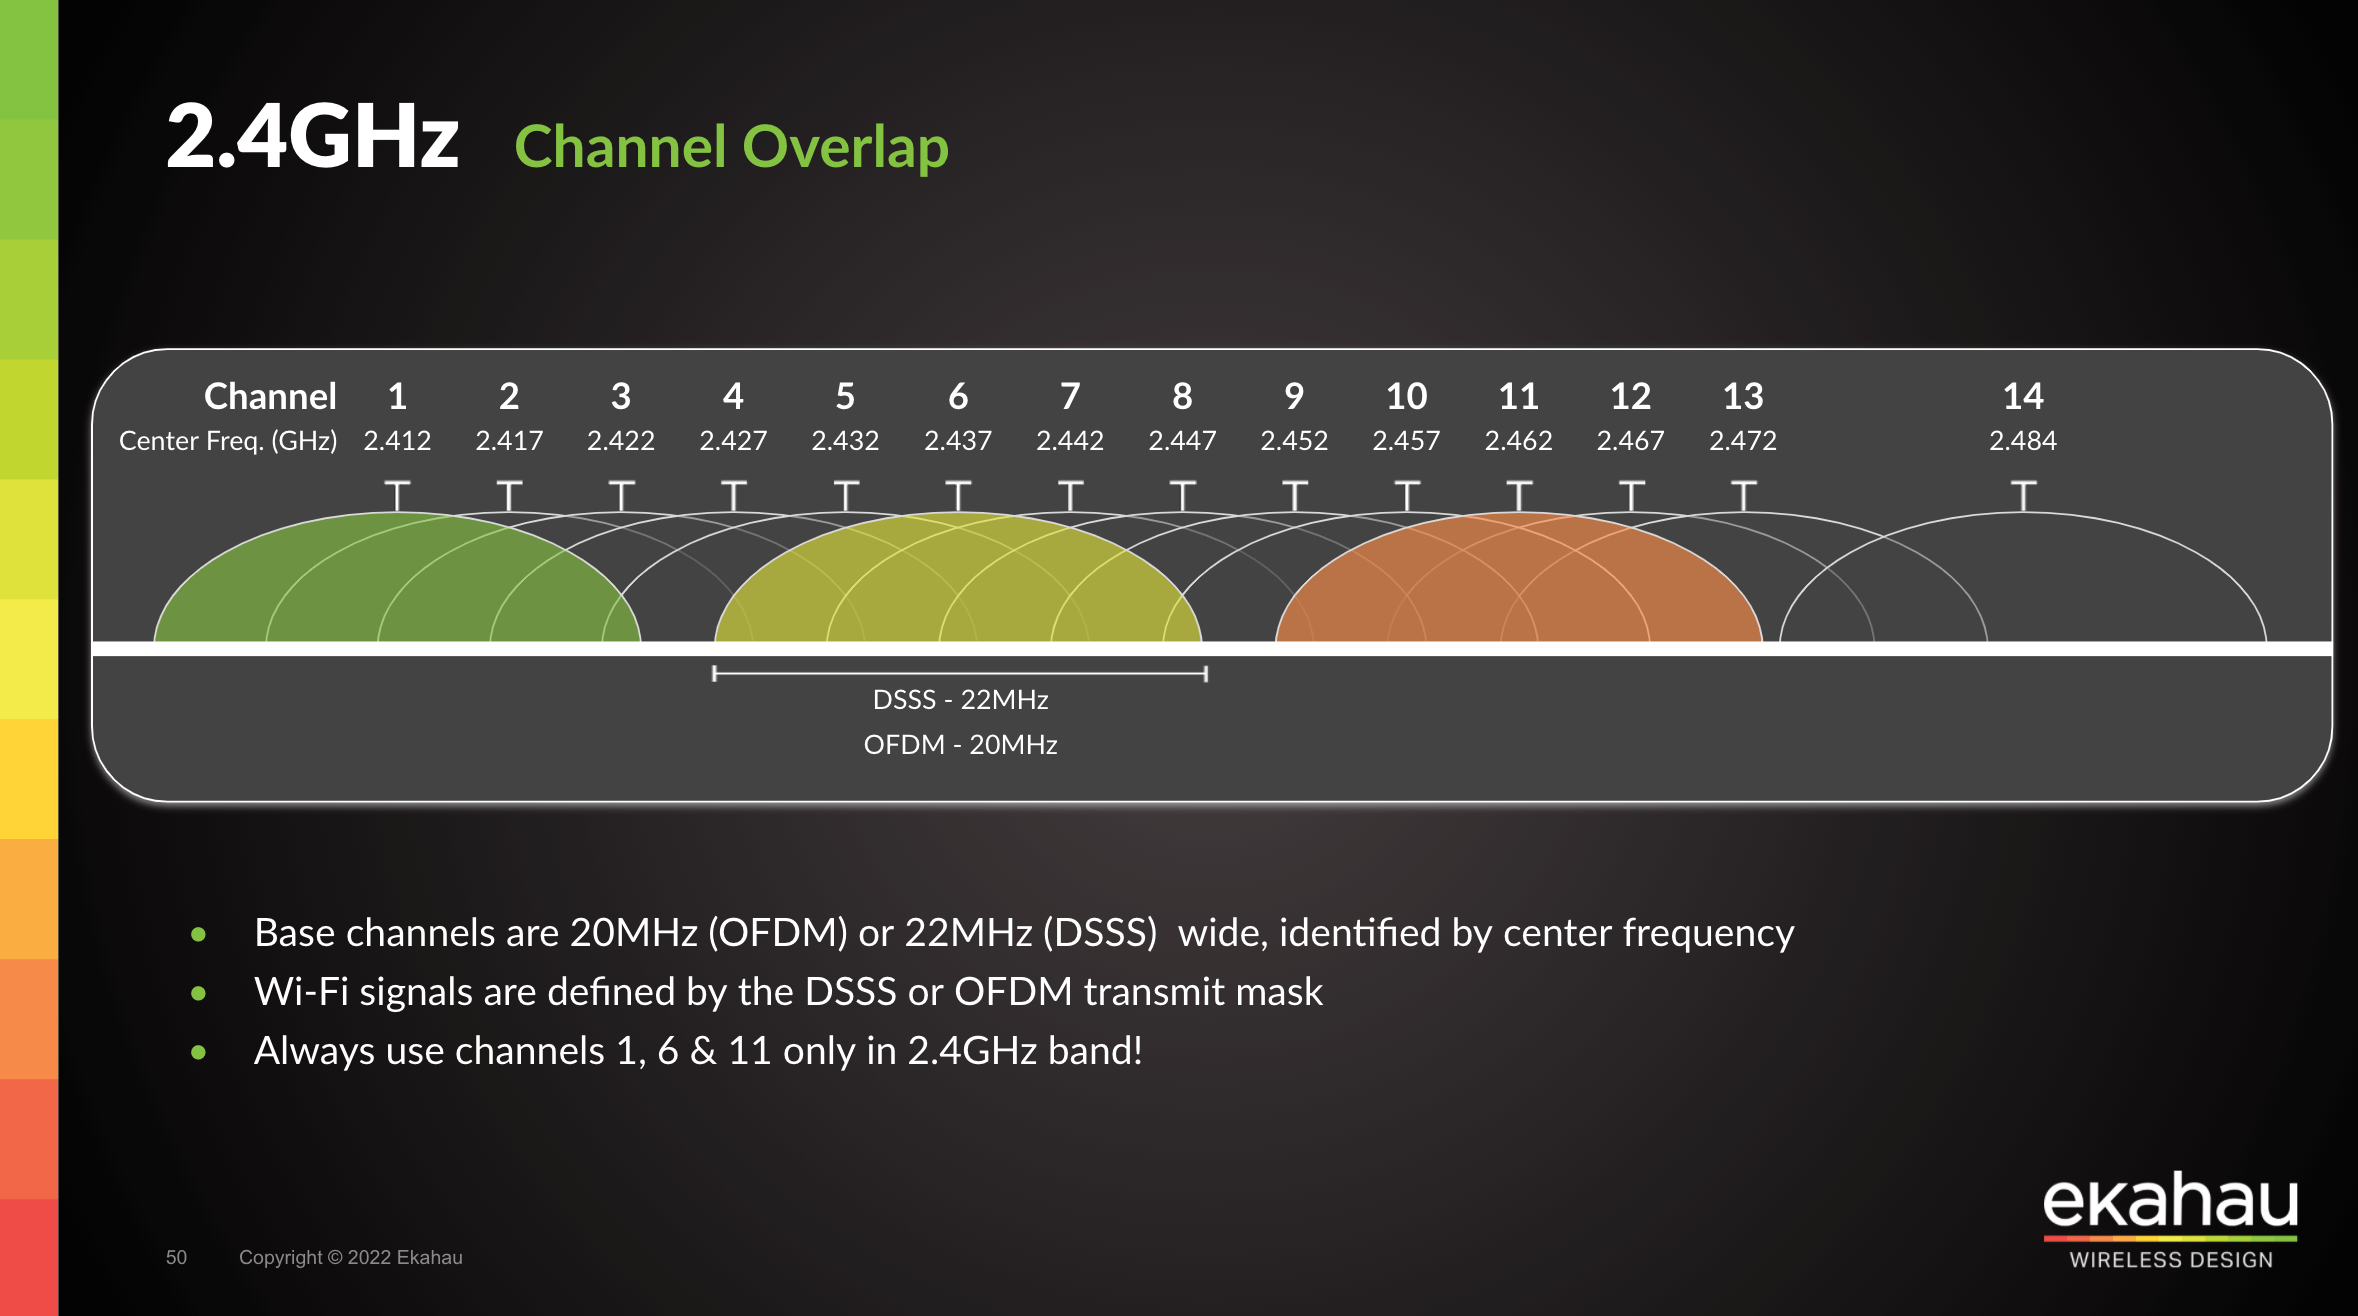
As a result, traffic placed into overlapping channels affect each other and cause congestion. Therefore, of the 14 channels available, only three are actually immune to channel interference: channels 1, 6, and 11.
However, keep in mind that this immunity only applies to the router one connects to. If there is other WIFI traffic in the vicinity of the application, channels in use by those will also impact the traffic experience of the user's application.
For 5GHz and others, the setup is much more flexible due to the standars imposed. Please, refer to WIFI channel information on the Internet for a detailed description of the topic. - Channel congestion is not only an issue for a specific router one may be using, but is a problem shared by all Internet routers present in a given area of use. 2.4GHz WiFi signals have a range of up to 300 feet indoors and 1500 feet outdoors. For best results, your connected device should be within 150 feet of the WiFi router. Typical indoor range for 5GHz signals is approximately 100-200 feet (30-60 meters) from the router. Given these distances, all routers present in the space shared will impact each other according to their channel uses.
- WIFI signals can penetrate walls provided they are not solid concrete. 5GHz Wi-Fi range and ability to penetrate walls are generally less effective compared to 2.4GHz Wi-Fi.
- There are many tools available that will help with determining channel use and device counts present in an area. This information can be used to achieve improvements to any WIFI problems encountered.