¶ Overview
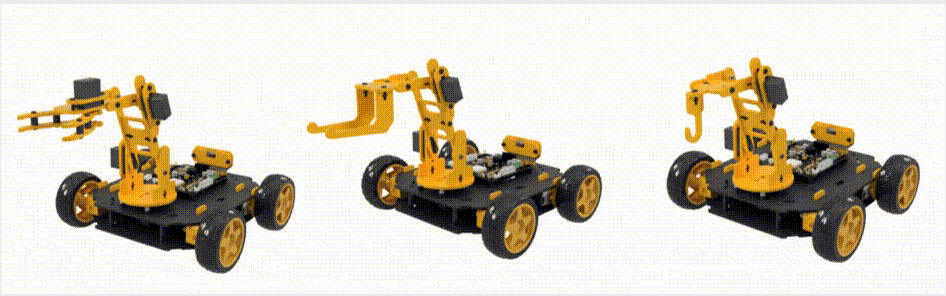
The REX Kit Robotic Arm module is 4-DOF hardware driven by four servos.
It is usually mounted on top of one of the many chassis provided by the REX Kit. The end point is a Claw that can be replaced with two other modules.
Full installation instructions are provided on the Robotistan GitHub page. Here, we will focus on the programming aspects of the unit and learn about using it via a WIFI Remote Control programmed on an Android Phone.
¶ Servo Numbering and Connections
This robotic Arm's four servo motors are connected to the REX Controller Board, which uses an ESP32 microcontroller. A close-up of the actual Arm unit and the controller will help us better understand the connectivity and naming of these four servo motors.
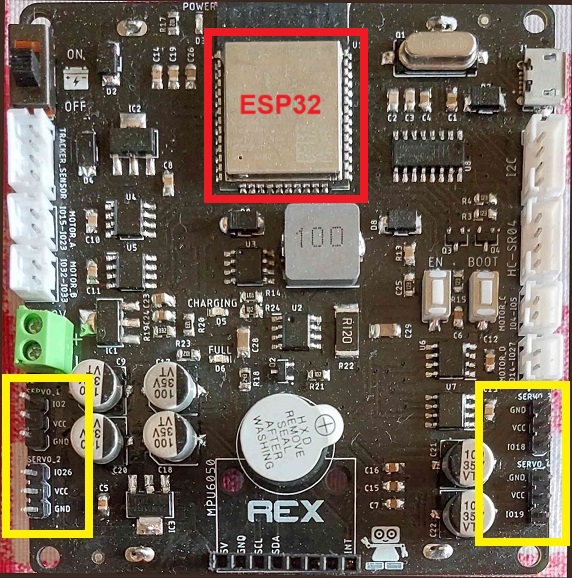
The directional orientation of the Controller board is such that the ESP32 chip (outined in red) is positioned towards the front of the vehicles it is used with. In that position, LEFT and RIGHT is based on looking down from the top.
As can be seen in the yellow outlined connector positions, Servos #1 and #2 connect to the left side edge, and Servos #3 and #4 connect to the right side edge of the controller board. When connecting the servo cables, make sure the BROWN cable is connected to the GROUND.
Servo #1 controls the rotation of the base in the range of 0-180 degrees.
Servo #2 and #3 control the forward / backward and up / down reach of the unit.
Servo #4 controls the Claw. Position 0 degrees is claw closed, and 80-120 degrees is claw open.
To prevent inadvertent movements of the servos that can be damaging to the kit and its components, the movements of the servo motors have been limited by the library settings. Once the user is familiar with the operation of the servos, it is possible to change these limits to suit the needs of the projects.
¶ Software Support
REX Kit and its components are supported by the REX Kit Library of MicroBlocks.
¶ Library Selection
The REX Kit Library provides support for the four DC motors, four Servos, HC-SR04 Distance Sensor, two infrared Line Sensors, and the Piezzo Speaker.
Any additional components that the user might want to attach to the basic car chassis may require additional library support not covered by the REX Library. That's because there are already MicroBlocks libraries that work with those components.
These may be:
- 0.96in OLED display - OLED Graphics Library, TFT Library
- ESP32 WIFI functionality - WIFI Library
- Remote Control - using WebSocket, UDP, WIFI, BLE, IR Remote Libraries
- HuskyLens AI Camera - HuskyLens Library
- MPU605n 6-Axis Inertia and Gyro module - Motion (MPU6050) Library
Please refere to the Libraries section of the WIKI to find out about loading and working with Libraries.
For details of the REX Kit Library blocks, please refer to the REX Kit Library section.
¶ Project Download
For a quick startup, we provide two application to control the REX Arm:
- MicroBlocks - REX Arm Remote Control
- REX Arm Control APP for Android
These work together to allow you to control the REX Arm from your phone. Communication is over WIFI using WebSocket protocol.
Click on the links below to download the programs.
MicroBlocks - REX Arm Remote Control
REX Arm Control APP for Android You can also scan the QR code to download the APP to your phone.
It is an APK file and needs to be sideloaded to the phone.
You may have to provide permission to install unknown apps.

¶ How to Use
¶ MicroBlocks Program:
MicroBlocks program needs to be loaded into the MicroBlocks IDE.
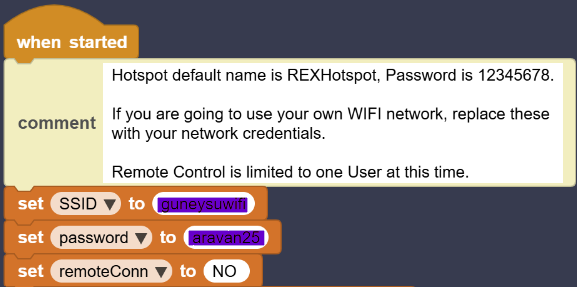
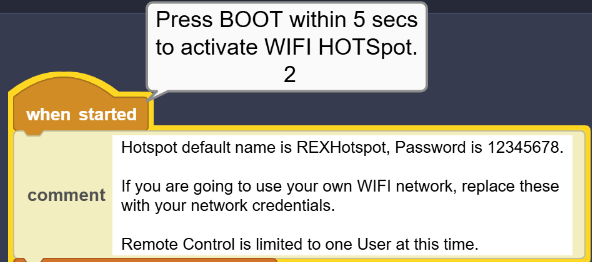
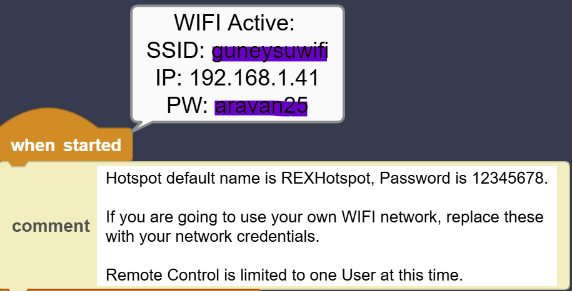
You will need to modify the When started script of the program to change the SSID and PASSWORD Info to your network credentials.
It is suggested to connect the IDE to the REX Control card using BLE, so that the robot car can be free to move around.
BLE connection to the IDE will also let you see the display messages used by the program.
If you do not have a need for the roaming functionality of the car, you can connect the controller to the IDE using a USB cable.
The program will work in one of two modes:
- as a WIFI Client / WEBSocket Server
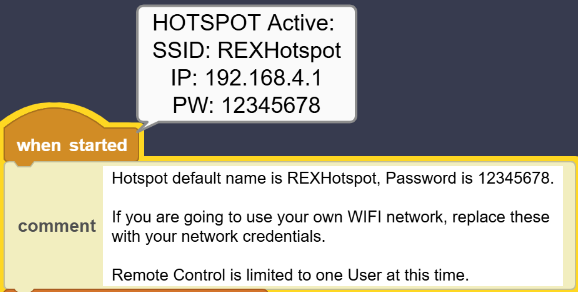
- as a HotSpot / WebSocket Server.
A message is displayed for you to press the BOOT button on the REX controller within 5 seconds to initiate the HotSpot mode.
If you do not press the button, the program will switch to regular WIFI Client mode.
Option #1 is simplest and will work over your existing WIFI network.
If you choose this option, the program will sign-on to your WIFI SSID and obtain an IP Address.
IP Address will be displayed, and will be used by your phone APP to connect to the Server.
Option #2 is helpful if you do not have access to a WIFI network, or are in a restricted environment, like a school etc, where WIFI access is not readily feasible.
If you choose this option, the program will start as a HotSpot and will display its credentials,
¶ Android Program:
You should have downloaded and installed the APK listed above.
Option #1
If you have chosen to use your regular WIFI network, then you are ready to run the phone APP.
Option #2
If you have chosen the HotSpot Option mentioned above, there are a few extra steps to perform:
You have to use Android WIFI sign-on and select this HotSpot to connect to it.
On your phone, a display similar to the one below will be shown.
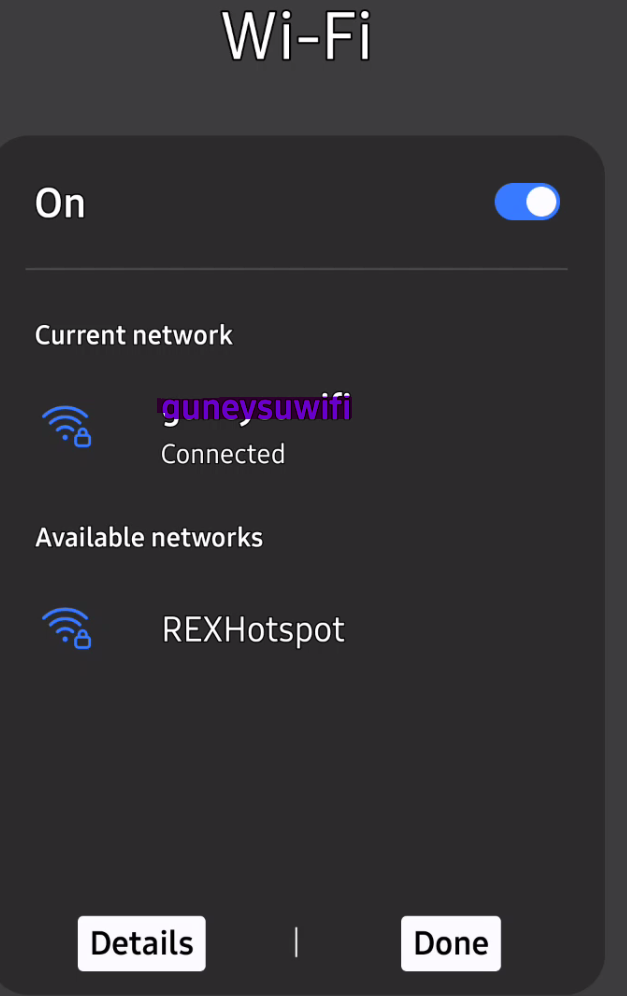
Select the REXHotSpot option and enter the password 12345678 to connect to the HotSpot.
Now you are ready to run the Android APP
¶ Running the Phone APP
Opening screen of the APP will look like this:
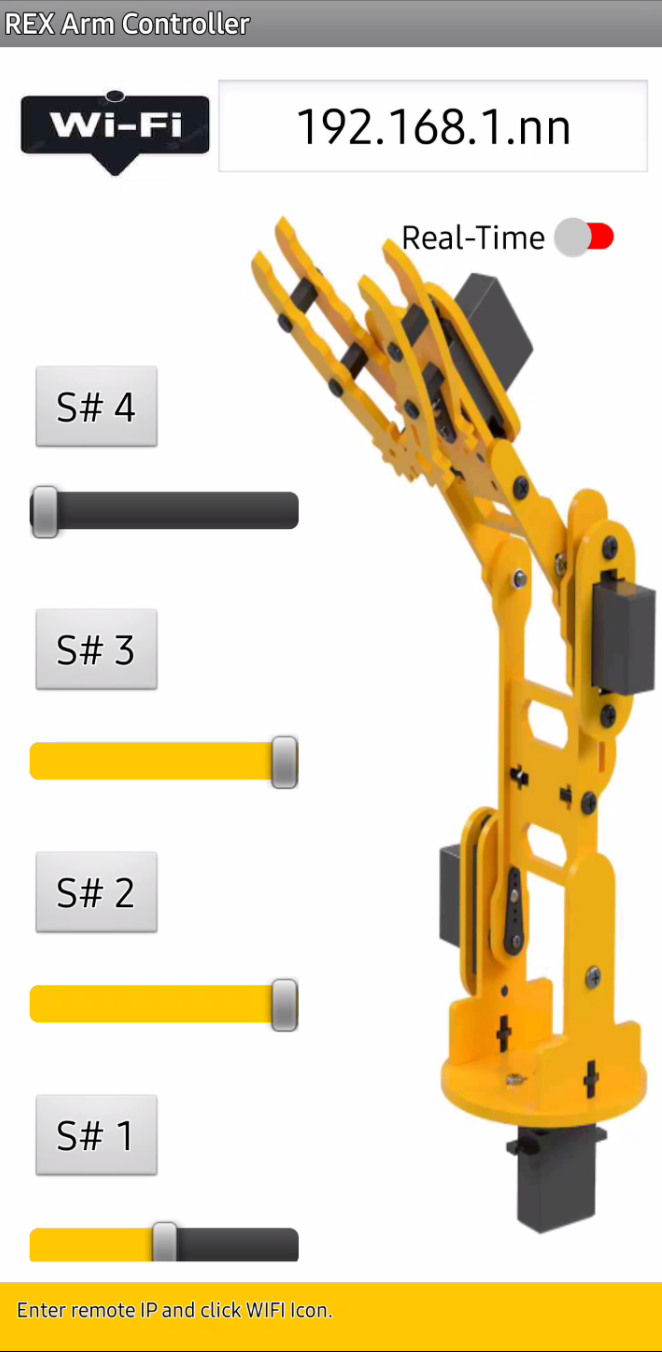
You will enter your IP address at the top entry area.
If you are using the HotSpot option, you'll probably will have an address that looks like 192.168.4.1.
If you are using your regular WIFI, your address will be something like 192.168.1.nnn or whatever your local addressing scheme is.
After the IP address is entered, click on the WIFI icon. APP will ittempt to connect to the network / device. When the connection succeeds, the display will change to the one shown below:
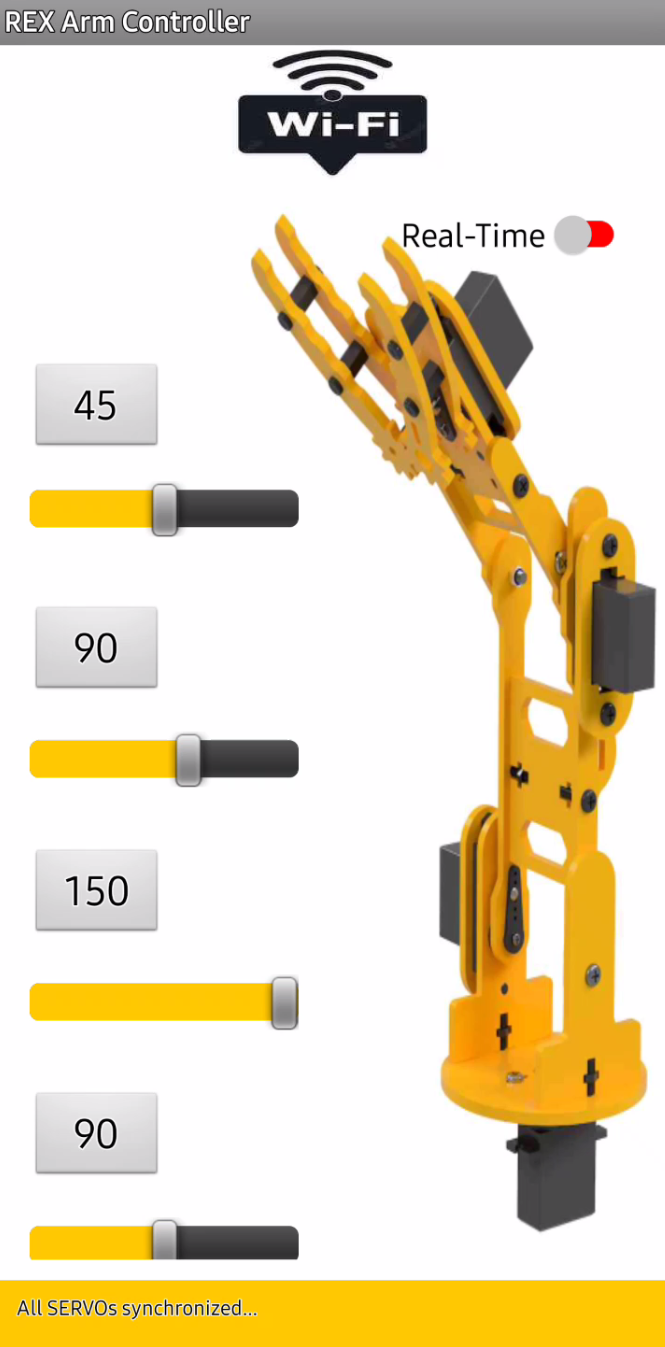
Notice several changes:
- WIFI icon is centered and shows WIFI signal eminating.
- All servos are displaying values and the corresponding sliders have been positioned accordingly
- Yellow message area at the bottom of the screen displays the message "All SERVOs synchronised."
You are now connected to the REX controller and synchronised.
The APP synchronizes with the MicroBlocks program and obtains the current servo positions for the Arm.
To control the Arm servos, select a servo and move its slider to a value and then click on the button with the number displayed for that servo.
This will send a message to the REX controller and activate its servo to be positioned accordingly.
Your action and its reply will be displayed in the message area at the bottom of the screen.
Similarly, your Microblocks program will also display corresponding messages received and replies sent.
That's it! Have fun with the REX Arm.