¶ Overview
HARDWARE CHANGE NOTIFICATION:
July 2024 timeframe, Robotistan introduced a change with the Temperature & Humidity Sensor and motor controller module. They have switched to I2C version of these modules, which will offer better functionality.
Corresponding changes in the MicroBlocks Library have been implemented as of version 2.7 of the PicoBricks Library.
**Make sure to review the HARDWARE CHANGES described in the set motor and set servo blocks, as well as the Motor Module section in this WIKI for the details.
The example provided here is applicable to SERVOs attached to the OLD Motor Controller module.
The PicoBricks motor control module can control servo and/or DC motors in various combinations:
- two servos
- two DC motors
- one servo and one DC motor
Servo motors are attached to the board via three pin motor connectors.
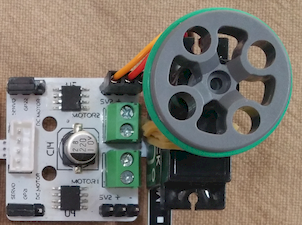
DC motors are attached to the two green power connectors.
Note: This board can control the speed of a DC motor, but not its direction. If you want the motor to spin in the opposite direction, just reverse the motor power connections.
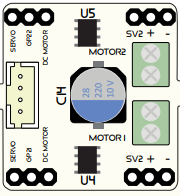
Each side of the motor control module is configured for the type of motor it will control. Selection is done using the black jumpers blocks on the left side of the module. To change the motor type, pull the jumper off the pins, then replace it so that it connects the center (GP) pin to the pin for the type of motor you have.
¶ Library Selection
The PicoBricks Library covers the eight basic sensors and switches on the board. However, it does not handle the three separate components:
- 0.96in OLED display
- ESP WIFI and Bluetooth Connector modules
- Using the motor control module with servos
That's because there are already MicroBlocks libraries that work with those components.
Here we will look at how to load the Servo library into MicroBlocks IDE to enable us to control a servo motor.
-
When you open the MicroBlocks IDE, you will notice a Libraries + entry just below the left category selections.
-
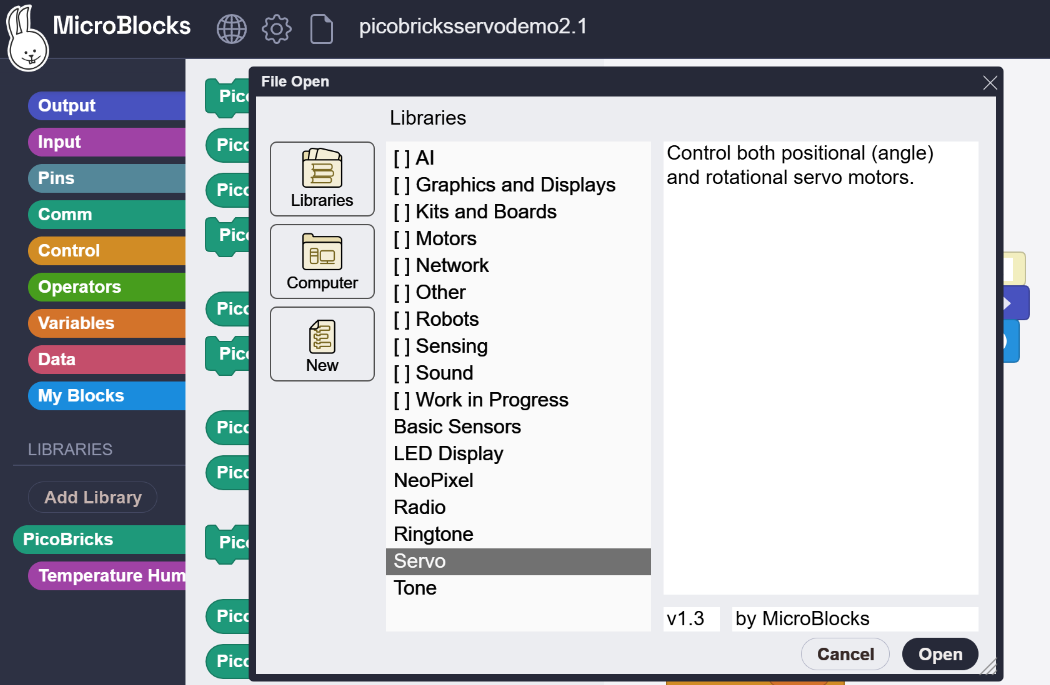
After clicking on the +, you will be presented with the opening menu of the Library selections:
-
Select Servo.ubl from the list, and the library will be loaded into the IDE.
-
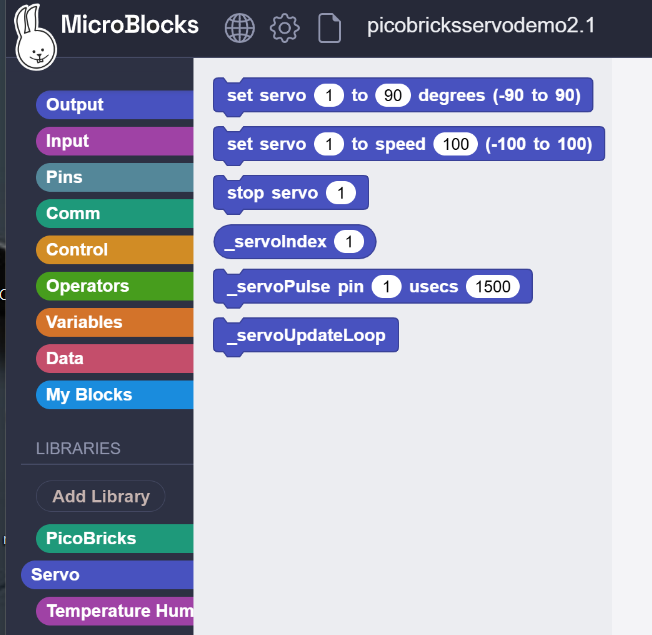
The left side Libraries listing will now include the Servo library.
¶ Servo Control Demo Program
We have provided a small program that will let you exercise a 180 degree servo motor connected to motor #2 (the top one).
Open a Browser session with the MicroBlocks IDE and download the program from the link below and load it into the IDE.
DOWNLOAD: Picoservo Demo Program
Your screen should look like this:
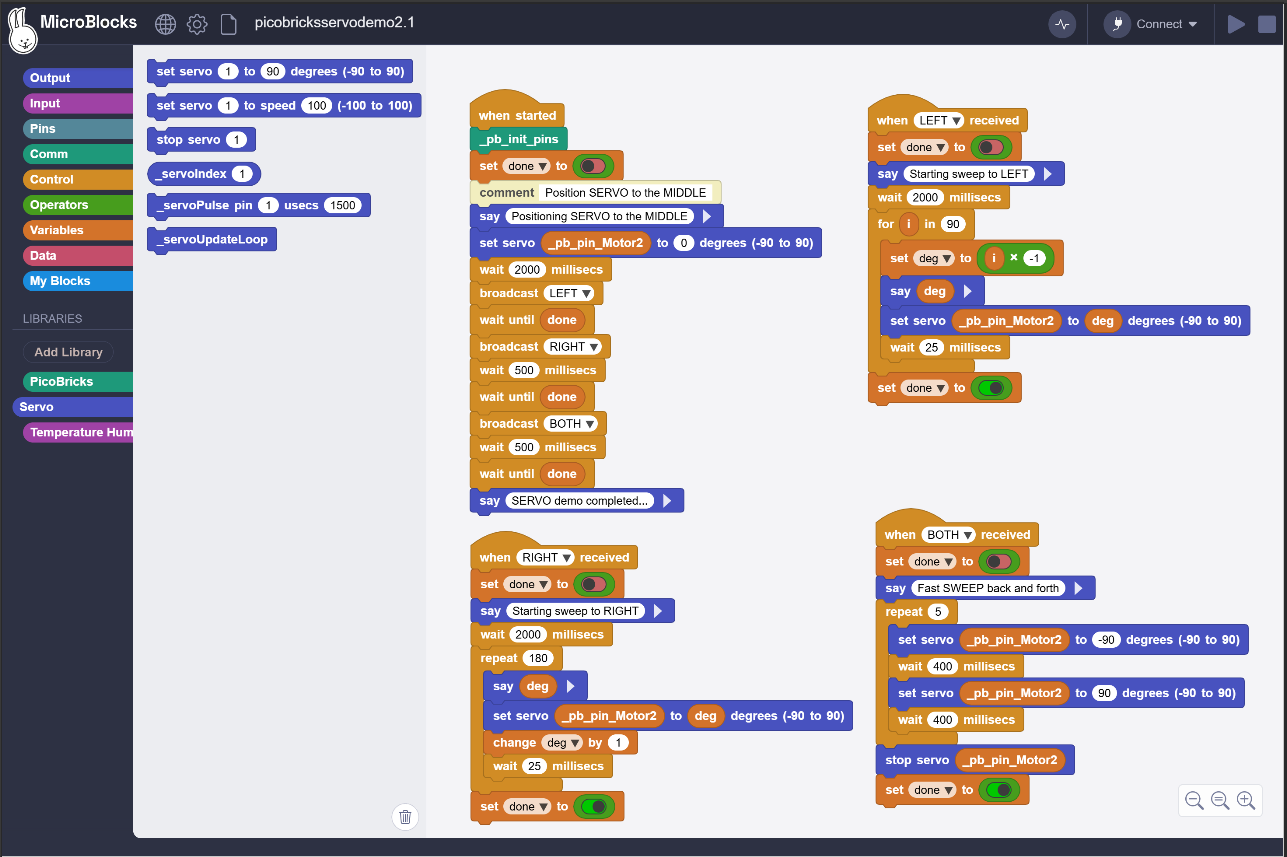
While the demo program shows operation of a 180 degree servo, it is also possible to use the library with continuous rotation (360 degree) servos using this block:

Positive speeds make it spin in one direction, negative speeds the other. The absolute value of the number determines the speed.
Note: Some servos may not turn at all at very low speed settings. You will need to experiment to find the best speed range for your servo.
¶ Running the Demo Program
The demo program demonstrates the servo actions for a 180 degree Servo motor.
After initializing the libraries, it will go through the following manuveurs:
- Set the servo to the middle position.
- Sweep left 90 degrees by 1 degree increments
- Sweep right 180 degrees by 1 degree increments
- Five rapid sweeps
These make up all the actions one can perform with the servo blocks.
NOTE: Servo motors differ and they are not precisely calibrated, so a given servo motor may not move to the exact angles indicated by the commands. Experimentation may be needed to find the number to move your servo to the exact angle you want.
¶ Looking inside the demo program
If you want to modify the program and try out different ideas you may have, you will need to have access to the all the program variables. By default, variables and functions used internally to implement a project or library are hidden. That makes it easier to see and find the most useful blocks.
To see those internal details, enable the advanced mode setting in the MicroBlocks menu:
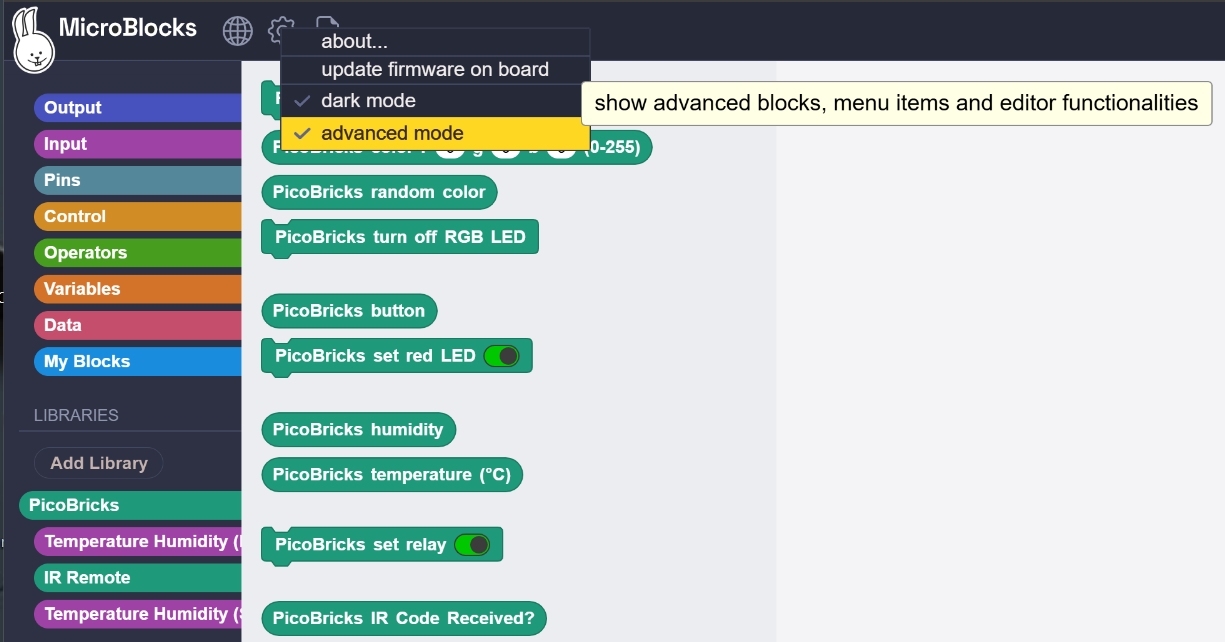
When this is done, all the program variables, as well as all the advanced blocks in the various libraries will be visible.
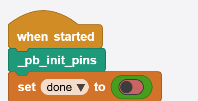
Normally, the PicoBricks library blocks automatically initialize the library and take care of the pin assignments. However, since the Servo functions are in a different library, you need to make sure that the PicoBrick initialization block _pb_init_pins is run once to assign the servo control pins. This is done by placing the block right at the beginning of your program, as shown below:
When you take a peek to the Variables category, you will see many hidden blocks listed. You will notice two blocks that control the pin assignments for the Motor Control module:


You will need to use one of these blocks in your servo control blocks, to in order to direct the servo actions to the desired motor.

Now go ahead and have fun with the servos.