¶ Overview
The MicroBlocks virtual machine runs on a Raspberry Pi (any model), allowing you to use MicroBlocks to control the Pi's I/O pins. However, since the Raspberry Pi is a full-blown Linux computer, not a microcontroller, it behaves a bit differently than other MicroBlocks boards.
First, since it runs on top of Linux, MicroBlocks on the Pi doesn't have the precise timing control of a true microcontroller. For example, if you write a MicroBlocks program to generate an audio tone by toggling a Pi pin, you'll hear short audio dropouts while the Linux scheduler runs other Linux processes. Similarly, MicroBlocks prorams that must decode signals with fast, precise timing, such as the signal from an IR remote control, may not work well on the Raspberry Pi.
On the other hand, the Raspberry Pi has some huge advantages: compared to a microcontroller it is lightning fast and has oodles of memory. Those difference are dramatic. The Raspberry Pi 4+ is about a hundred times faster and has nearly a million times as much RAM as a micro:bit v1!
In addition, MicroBlocks exploits the Pi's graphics and sound systems. Output intended for 5x5 micro:bit display or small TFT displays is displayed in a window on the Raspberry Pi at blazing speeds, and MicroBlocks uses the Pi's audio system to generate glitch-free music with the Tone library.
¶ Setup
To use MicroBlocks on the Pi, you'll need two executable files:
- the MicroBlocks application
- the virtual machine (vm.linux.rpi)
The latest versions of those files can be downloaded from the Pilot release folder:
https://microblocks.fun/downloads/pilot/standalone/ublocks-raspberryPi.zip
https://microblocks.fun/downloads/pilot/vm/vm.linux.rpi
You'll need to unzip the application.
You also need to install two packages by running the following commands in a terminal window:
sudo apt install libsdl2-2.0-0
sudo apt install libsdl2-ttf-2.0-0
Finally, to run the VM, you'll need to build WiringPi, which is not included with RaspberryPi OS anymore. Here's how to do it:
git clone https://github.com/WiringPi/WiringPi
cd WirinngPi
./build
¶ RaspberryPi OS 64bit
The IDE for RaspberryPi is built for 32 bit systems, so if you're running a 64 bit OS on your RaspberryPi, you'll also need to run the following commands:
sudo apt install libpangocairo-1.0:armhf
sudo apt-get install --reinstall libraspberrypi0 libraspberrypi-dev libraspberrypi-doc libraspberrypi-bin
Note that the MicroBlocks VM for RaspberryPi doesn't (yet) work on a 64 bit system.
¶ Creating a MicroBlocks Program
Make sure that vm.linux.rpi is executable, then start it:
chmod 755 vm.linux.rpi
./vm.linux.rpi
Finally, start the MicroBlocks application. When the MicroBlocks window opens, it should connect to the VM automatically. When it does, a green circle will appear behind the USB icon.
At this point, you can run commands and write scripts as you would with any MicroBlocks board. The LED Display library will display output in the resizable graphics window, as will the TFT and Turtle libraries. The Tone library will play tones and music through the RPI sound system. (Sound output on the Pi can go either to HDMI or to the audio jack; see the Raspberry Pi documentation for details.)
¶ Running a MicroBlocks Program
Your code is saved in the file ublockscode in the same folder as the virtual machine. When you've created a program you want to share, you can make folder with the ublockscode and a copy of the virtual machine. You can double-click on the virtual machine file to run your program without starting the MicroBlocks application.
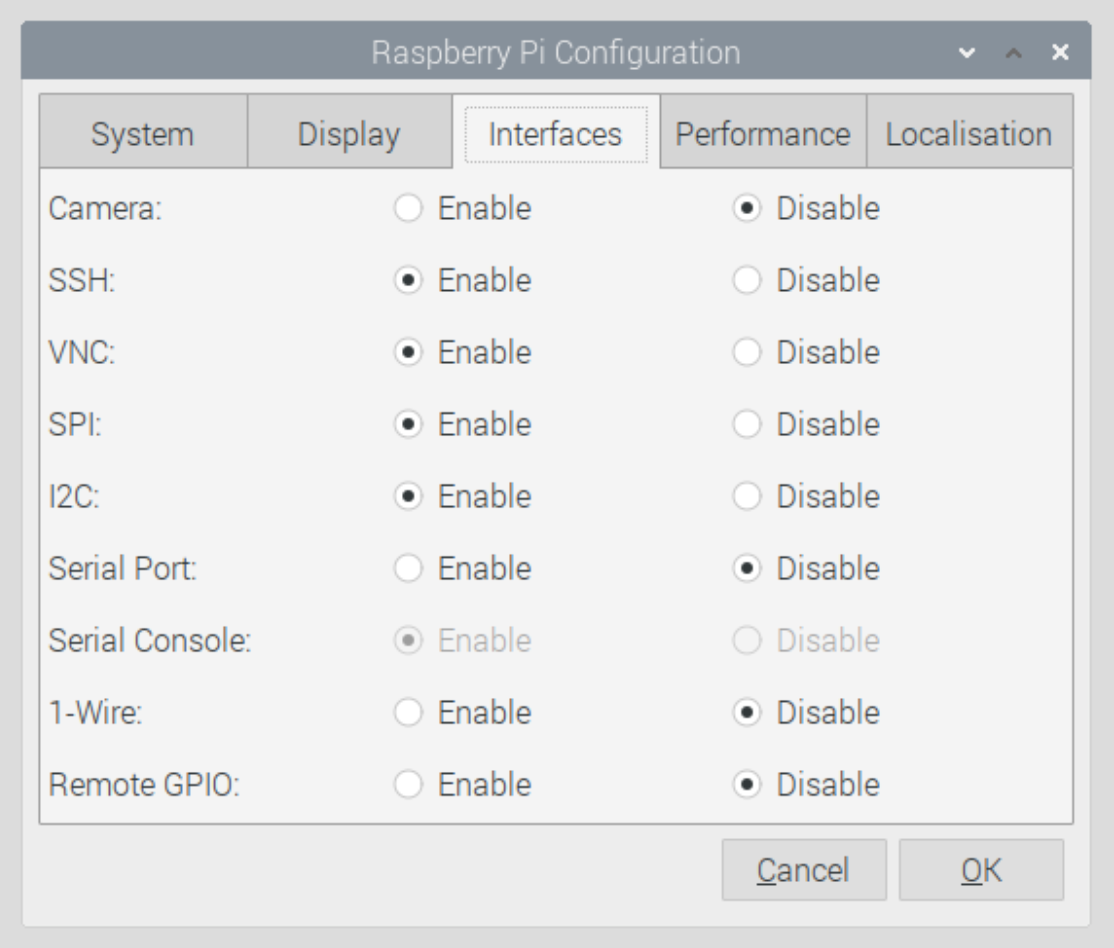
¶ Enables SPI and I2C
If you plan to communicate with hardware devices using SPI or I2C, you'll need to enable those features by selecting "Preferences>Raspberry Pi Configuration" in the Raspberry menu. Select the "Interfaces" tab and check the SPI and I2C boxes. My settings look like this:
