¶ Overview
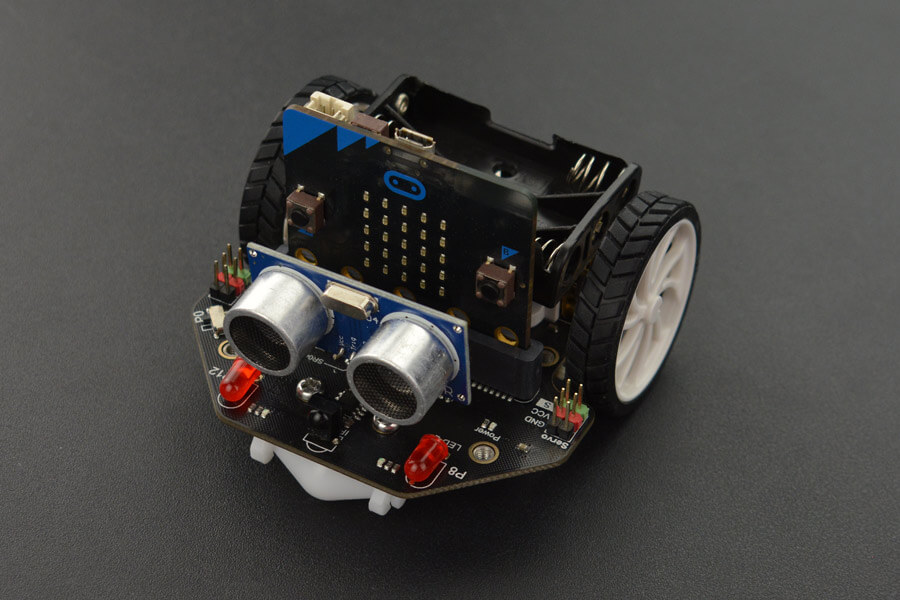
Maqueen is an easy-to-use programmable robot for STEAM education, which inherits the playability and simple operation of micro:bit. With a mini body, plug-and-play, and many standard features, it allows students to quickly learn how to control a programmable robotic car in an entertaining way, while nurturing their interests in science and logical thinking.
Picture below shows all the components and functionality provided by the kit. For a detailed description of the kit features, please refer to the product WIKI.
MicroBlocks fully supports the Maqueen.

¶ Summary of Blocks
For each block, there is a short description entry and a detailed block and component description. You can click on block pictures in the short description table to access the details and sample codes.
Sample codes on how to use the blocks have been provided. To try them out, all you have to do is open a browser session of the MicroBlocks IDE and drag and drop them onto the editor programming area. Then you can just click on them and see the results.
The NeoPixels located at the bottom of the kit are not directly controlled by this library. The MicroBlocks Neopixel library should be used for that. Pin number for the NeoPixels is 15. and the LED count is 4.
To test any of the sample codes below, just drag and drop them onto the MicroBlocks IDE.
¶ Working with Library Blocks
The library consists of a set of simple services, that together allow the user to have complete control of the Maqueen Car Kit.
Since some of the components are located on and powered by the main board, it is necessary to have a battery connected and main board power switch set to ON position in order for these components to function properly.
The RIGHT and LEFT designations are based on the view from the top and back of the car towards the front.
Maqueen Library has two distinct types of block shapes:
-
oval: these are reporter blocks that return some kind of information back. The user would normally either assign these to a project variable or use it in a suitable input slot of other blocks. The return information type is a Number.
-
rectangular: these are command blocks that perform a programmed function and do not return any information.
¶ Block Descriptions
¶ Maqueen beep

This block makes a short buzz sound via the speaker. The duration of the sound can be set in milliseconds. Since the buzzer pin is shared, you need to make sure that the P0 slider switch located at the right front edge of the kit is set to the audible mode to hear the buzzer sound.
For a more detailed ability to control the tone functionality, please refer to the TONE Library details.
¶ Sample Code

¶ Maqueen distance

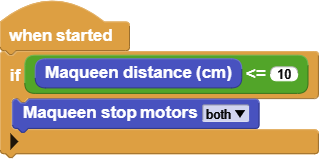
This block returns the distance measured by the distance sensor in cm. Make sure to mount the distance sensor into its dedicated slot in the front of the car kit.
¶ Sample Code

¶ Maqueen IR keycode

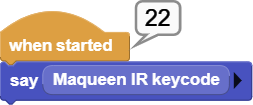
This block returns the IR key codes detected by the IR sensor. You need to point the IR keypad towards the IR sensor located at the very front of the car kit and press any buttons on it. The sensor works with keypads that produce NEC keycodes.
¶ Sample Code

¶ Maqueen LED

This block is used to turn on and off the two red LEDs located at the front of the car kit.
¶ Sample Code

¶ Maqueen line sensor

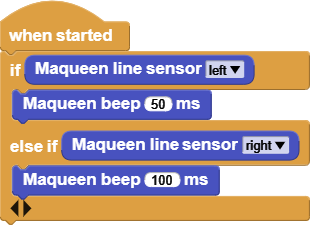
This block returns the line sensor results. If a line is detected, the sensor will return a FALSE reading, if no line is detected, it will return a TRUE reading. Corresponding to the sensor readings, the two blue LEDs at the front of the car will be off or on.
¶ Sample Code

¶ Maqueen motor

This block controls the direction and speed of the two motors on the car kit. Depending on the power levels of your battery, the speed settings will have a varying effect on how fast the motors run.
¶ Sample Code

¶ Maqueen sees line on left

This block returns the interpreted line sensor result such that it is easier to code the line tracking actions. There are a total of four conditions that sensors can be reporting:
- both on
- both off
- left on and right off
- left off and right on
Using these, it is very easy to use when condition blocks to steer the car.
¶ Sample Code

¶ Maqueen stop motors

Used to stop the selected motors.
¶ Sample Code
