¶ Description
This WIKI extract has been prepared for the App Inventor Team Members, to facilitate easy way of referencing MicroBlocks File Operations related information.
I have specifically updated many different ways MicroBlocks can handle file saving and loading. This is with the intention to demonstrate how easy it is to manage MicroBlocks programs. Depending on the method you chose to deploy, your instruction set for the teachers / student will be no longer than what is shown in each example below.
As a quick summary, I am providing here three ways a program can be accessed, other than the File menu options. Detailed descriptions can be found in the content below.
¶ 1 - via URL:
¶ 2 - As a PNG formatted image file:
Drag and Drop the image below on to the IDE:

¶ 3 - As a script fragment from clipboard:
This method is only applicable when working in the IDE with existing programs. It can be used to copy code from one program to another.
In this example, you do not have to worry about the creation of the script segment shown below. It is generated when one R-Clicks a script in the IDE and selects, copy to clipboard.
Copy and paste the bolded text below to the IDE.
GP Script
script 454 51 {
whenStarted
'[display:mbDisplayOff]'
forever {
setUserLED true
waitMillis 200
setUserLED false
waitMillis 200
}
}
¶ File

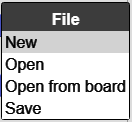
New
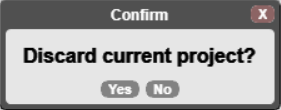
If there is a program loaded in the work area, it will display a message, asking for confirmation for clearing the active project.
Upon positive confirmation, starts a clean new scripting area as shown below:
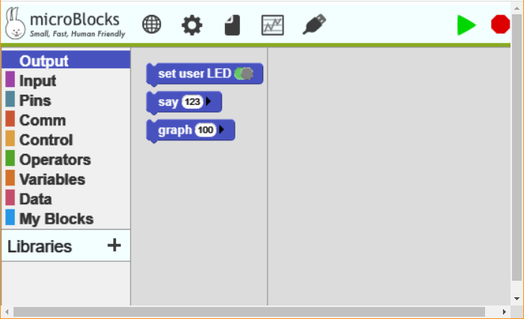
Scripting area is cleared of the previous script blocks. All user added libraries are cleared out. Depending on the micro device type and the setting of the option enable autoloading board libraries, certain libraries are loaded.
If the connect icon is not green and enable PlugShare when project empty is selected, then as soon as the USB connection is established, MicroBlocks will read and load the project from the attached micro device.
Open
This is how previously saved projects on user's PC is loaded into the work area. In addition to the user's own projects, other sample projects in various categories can be loaded.
If there is an active project in the scripting area, a confirmation message is displayed. See File New above.
A file open dialog is presented:
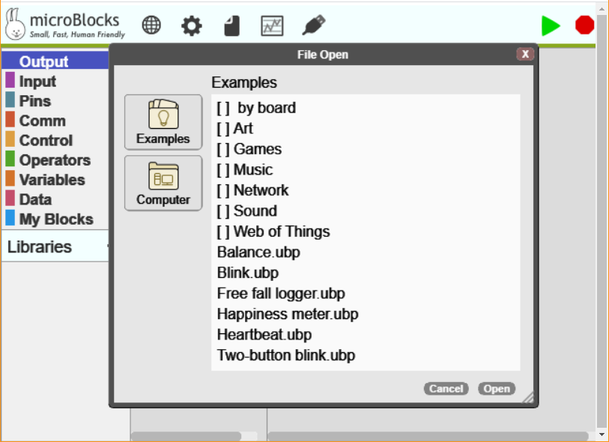
First display is focused on the Examples category, where many MicroBlocks projects for different micro devices and hardware options are presented.
User's own PC directories can be reached by switching to the Computer tab selection on the left. This will present the standard system file open dialog, where one can select previously saved projects.
Open from board
If the connect icon is not green and enable PlugShare when project empty is selected, then this option will be visible in the file menu. It will not be visible if the USB connectivity is established and the connect icon is green.
If there is an active project in the scripting area, a confirmation message is displayed. See File New above.
Assuming the above conditions are met, then as soon as the item is selected, a message to connect the device is displayed:
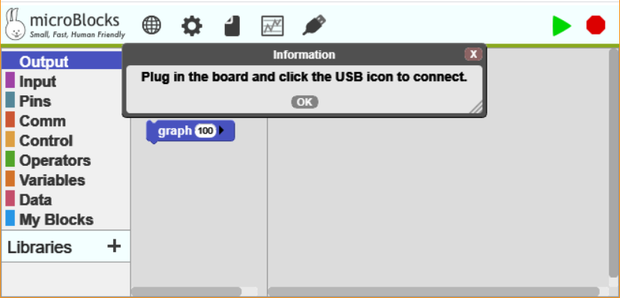
When the USB connection is established, MicroBlocks will read and load the project from the attached micro device.
¶ Alternative Program / Script Loading Options
In addition to the File Open command described above, there are several other ways of loading programs or individual scripts into the IDE.
-
As URL:
If the program was copied to the clipboard as URL and then the resulting link provided as such, the URL link can be clicked. This will result in the MicroBlocks IDE to be executed with the referenced program loaded and ready to be edited or run. Here is a link to the BLINK program. -
As a script fragment from clipboard:
Any and all of the individual scripts on the IDE can be saved to the clipboard via the R-Click menu options copy to clipboard, copy to clipboard as URL, copy all scripts to clipboard, copy all scripts to clipboard as URL.
These fragments can then be PASTED into the IDE and worked on.
Here is a script fragment for the Blink script: Copy and paste it to the IDE.
GP Script
script 454 51 {
whenStarted
'[display:mbDisplayOff]'
forever {
setUserLED true
waitMillis 200
setUserLED false
waitMillis 200
}
} -
As a PNG formatted image file, incorporating the program or script:
PNG files support an embedded header option, into which the body of a program or individual script can be placed. This is done by selecting R-Click enu options save picture of script, save picture of all visible scripts.
The resulting PNG files can then be drag/dropped onto the IDE. This will load the embedded program, ready to be worked on. Here is a picture of the Blink Program that embeds the actual code. Drag it to the IDE.

NOTE: All of the options above will preserve any libraries used by the programs, and will restore them upon loading.
Programs embedded in PNG images:
Some image / multimedia handling software do not always preserve the internal formatting of the PNG files. These may drop or delete the embedded header sections containing the program code, resulting in unsuccessful restoral of the programs / scripts.
Save
Once a project is ready, it needs to be saved to the user's PC.
Selecting SAVE will display a system file dialog, where the user can give the program a name and save it to their PC.
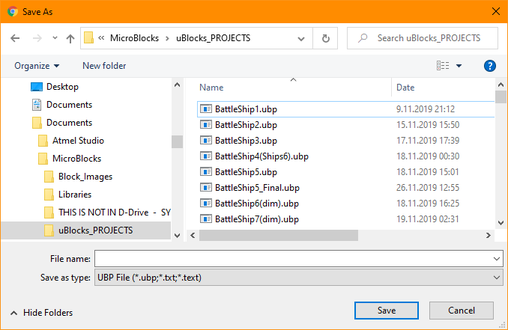
There is no pre-configured file save location or option in MicroBlocks.
Designating the file locations on the PC is the user's responsibility.
¶ File Advanced
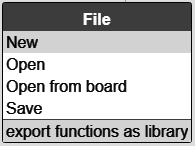
Copy project URL to clipboard
One of the ways to save or transfer the project to another editing / publishing environment is to export it as an URL.
When this option is selected, a copy of the project in the URL format is placed into the clipboard. Below is an example of the BLINK.UBP program saved as URL:
https://microblocks.fun/run/microblocks.html#project=projectName%20%27Blink%27%0A%0Amodule%20main%0Aauthor%20unknown%0Aversion%201%200%20%0Adescription%20%27%27%0A%0Ascript%2050%2050%20%7B%0AwhenStarted%0A%27%5Bdisplay%3AmbDisplayOff%5D%27%0Aforever%20%7B%0A%20%20setUserLED%20true%0A%20%20waitMillis%20200%0A%20%20setUserLED%20false%0A%20%20waitMillis%20200%0A%7D%0A%7D%0A%0A
The URL format can be broken down into several parts:
-
Protocol (https): This indicates that the connection to the website is secure and encrypted.
-
Domain (microblocks.fun): This is the address of the website that hosts the MicroBlocks application.
-
Path (/run/microblocks.html): This specifies the location of a specific file within the website. In this case, it points to the "run" directory and then to the "microblocks.html" file. This file contains the core functionality of the MicroBlocks online editor.
Different MicroBlocks IDE versions (Stable Release vs Pilot Releases) have different paths for the IDE. As such, when you save in either of these environments, the generated URL will point to the version from which the program was saved. -
Fragment (#project=projectName...): This part doesn't affect loading the page, but it provides additional information within the webpage itself. It's called a fragment or hash. Here's how it breaks down further:
- #: This symbol indicates the start of the fragment.
- project: This keyword tells the MicroBlocks program to focus on the "project" section.
- =projectName: This assigns a value (likely replaced with the actual project name) to the "project" section. Here the project name is BLINK.
-
Hidden Part: Encoded Project Data
The remaining text after #project=projectName is the encoded data related to the MicroBlocks project itself.
Saving projects in this way can result in extremely large URL strings, depending on the project's size and libraries used. At times, it may come in handy to use a URL-Shortener service. Here is the short version of the BLINK example used earlier, created via T.LY web service: https://t.ly/dtF9d (may not be permanent)
URL handling varies depending on the browser used. In addition, different document editing environments may place a limit on the URL strings used.
Maximum length of a URL in different browsers :
Most web browsers display the URL of a web page in the address bar. There is a limit on the length of the URL basing on the browser we use. Here are the details.
Google Chrome – Google Chrome allows the maximum length of the URL to be of the size 2MB (2,097,152 characters).
Mozilla Firefox – In Firefox the length of the URL can be unlimited but practically after 65,536 characters the location bar no longer displays the URL.
Edge – Edge allows the URL length to be a maximum of 2083 characters but not more than 2048 characters in the path portion of the URL.
Opera – Opera allows the URL length to be unlimited.
Safari – The maximum length of URL in Safari is 80000 characters after crossing this limit the page displays an error.
Apache(Server) – Apache allows the URL length to be a maximum of 4000 characters after which it throws an error message.
export functions as library
When custom blocks are created in a project, they normally will be saved as part of the user project file with an UBP extension.
If, however, it is desirable to make a library out of the custom blocks, and save and load them independently as library code (with an UBL extension), then they will need to be exported from the script and saved into a separate file.
This selection makes that happen.
It will display a dialog window, where the name of the library can be assigned and saved. The new file will have an UBL extension.
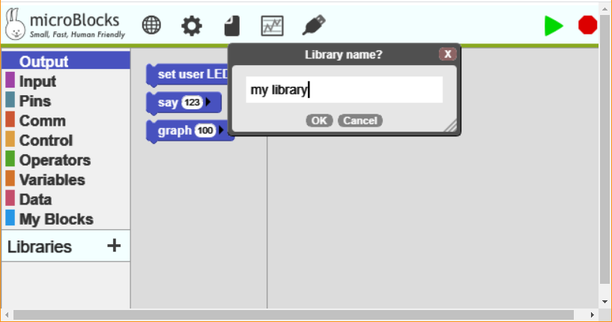
For further specific information on how to create a library, refer to the WIKI menu item: Creating A New Library.