¶ Importing extension components
You use an App Inventor extension component just as you would use an ordinary built-in component, except that you’ll first need to import the extension into your project.
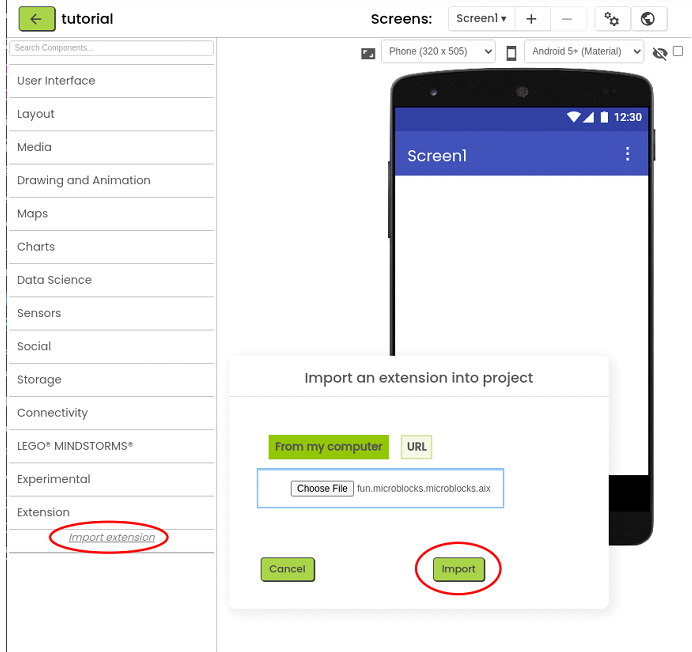
Before you can import an extension component, you must have a project open. Start a new project, or open an existing one. To import an extension, look in the components palette at the left of the screen under Extension and click the “Import extension” link as in the figure below. This will bring up a window that lets you specify an extension to import. Extensions are defined by aix files. You can import an extension from an aix file on your computer or you can specify a URL to import from the Web.
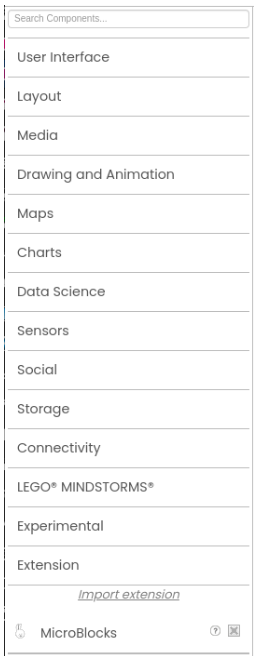
Once you import an extension, it will appear in the components palette under the Extension category as shown in the figure below. After importing an extension, make sure to restart the companion app, else an error may occur.
¶ Building projects with extension components
Once you have imported an extension component into a project, it will appear in the component palette under the Extension section. You use the extension component just like any other component by dragging it from the palette to the designer screen, where it will appear under the designer screen as an non-visible component. You’ll also see it in the Blocks Editor, together with blocks for its methods, properties and events. The figures below illustrates how an imported MicroBlocks extension would appear in the Blocks Editor.

¶ Deleting extension components
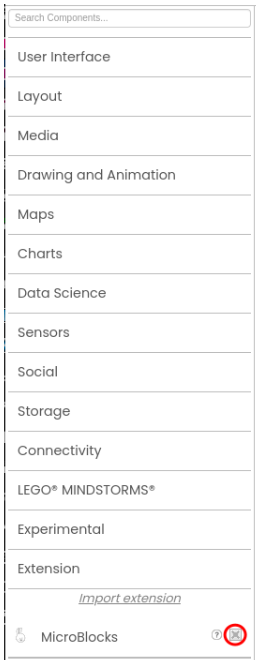
To delete an extension from the project, click the X beside the extension. This will remove all uses of the extension and its blocks from the project and you will not see it in the Extensions palette panel anymore.
¶ Sharing projects that use extension components
You export and import projects that use extension components just like other App Inventor projects, as aia files. You need not do anything different in publishing the project than in publishing other App Inventor projects. If someone imports a project (aia file) that uses an extension, they do not have to import the extension (aix file) separately: When they open the project, the extension will appear in the components palette (under Extensions) together with the project’s other components.
¶ Which extensions will you need to import
For our examples you will have to import 2 extensions:
-
The BluetoothLE extension. It adds Bluetooth Low Energy functionality to your applications.
You can use the following URL to download it. https://mit-cml.github.io/extensions/data/extensions/edu.mit.appinventor.ble-20240822.aix -
The MicroBlocks extension. It allows you to communicate with a microcontroller that is programmed using MicroBlocks. You can use the following URL to download it.
https://microblocks.fun/mbtest/tmp3/fun.microblocks.microblocks.aix
After importing the extensions the Extension palette panel will look like this:
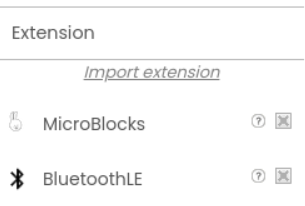
You have to drag both extensions to the phone screen. After that you will see both of them below the phone screen as a Non-visible component.

You will only use one block from the BluetoothLE extension. You can find it on the bottom of the blocks overview when you have selected the BluetoothLE extension in the Blocks editor.

¶ Extension Blocks Descriptions
All Sample Codes provided below can be drag/dropped onto either MicroBlocks or AI2 IDEs.
¶ Methods:
¶ Connect

Connects to the MicroBlocks device with the given name. Import the “Bluetooth LE” extension and use the “Bluetooth LE” block from that extension as the first parameter of this block. The second parameter is the name of the board you want to connect to such as “MicroBlocks XYZ” where XYZ is the board’s three-letter BLE ID.
| Parameter | Type |
|---|---|
| bleExtension | component |
| name | text |
¶ Sample Code
The name of a MicroBlocks BLE enabled device is MicroBlocks followed by a space and the 3 letter BLE id.

If the board is a Raspberry Pi Pico W, then the name is Pico followed by a space and the 3 letter BLE id.

If your board has a display, it will show the BLE id when powering up. If the board doesn't have a display, you can get the BLE id by using the BLE id block that you can find in the Input category of MicroBlocks. The board has to be connected to the IDE to show the BLE id.

¶ disconnect

Disconnects from the currently connected BluetoothLE device, if any.
¶ isDeviceConnected

Returns true if a device is connected.
Return Type: boolean
¶ sendMessage

Send the given message to MicroBlocks.
| Parameter | Type |
|---|---|
| message | text |
¶ Sample Code
Two examples are provided, demonstrating sending messages from AI2 to microcontrollers:
- Send a simple message to microcontroller
- Send a message containing a label and a value to the microcontroller
Send a simple message to microcontroller
AI2 is sending a message with content smiley to the microcontroller.
Two different techniques of receiving this message on the MicroBlocks side is shown below:
- MicroBlocks is looking for a specific message "smiley"
- MicroBlocks is programmed to receive ANY message. It then evaluates the last message variable content for what it is looking for - smiley
| MicroBlocks Script | AI2 Script |
|---|---|
Receive a SPECIFIC message: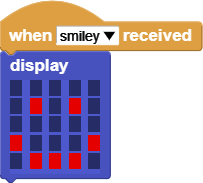 Receive ANY message: 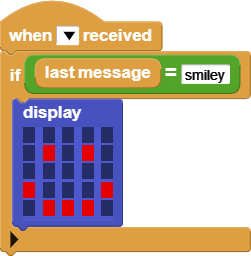 |
 |
Send a message containing a "label and a value" to the microcontroller
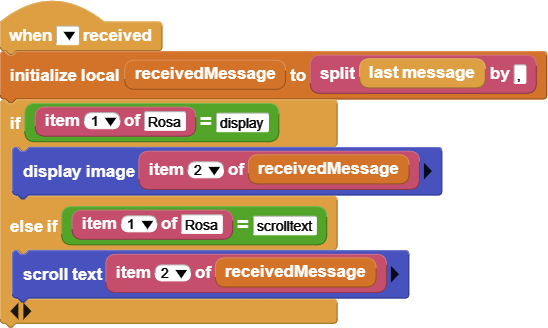
AI2 is sending two messages containing a label and a value in each message. The label and value are combined into a string separated by a comma.
MicroBlocks is waiting in an event of receive ANY message. When it arrives, it splits the message by a comma and takes action accordingly. There are two actions requested: display and scroll text.
| MicroBlocks Script | AI2 Script |
|---|---|
 |
  |
¶ Events:
¶ ConnectionChanged

This event is run when a device is connected or disconnected.
| Parameter | Type |
|---|---|
| isConnected | boolean |
¶ MicroBlocksMessageReceived

This event is run when a MicroBlocks message is received.
| Parameter | Type |
|---|---|
| message | text |
¶ Sample Code
Three examples are provided to demonstrate the various methods of sending messages from the Microcontrollers:
Receive a single value from the microcontroller
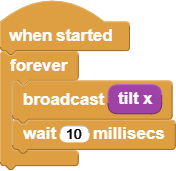
MicroBlocks is sending a SINGLE "tilt x" value, which is received by the AI2 APP in the "message" parameter.
| MicroBlocks Script | AI2 Script |
|---|---|
 |
 |
Receive multiple values from the microcontroller
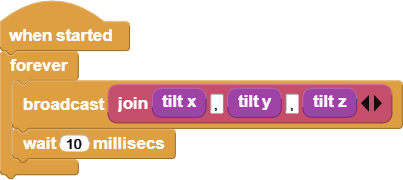
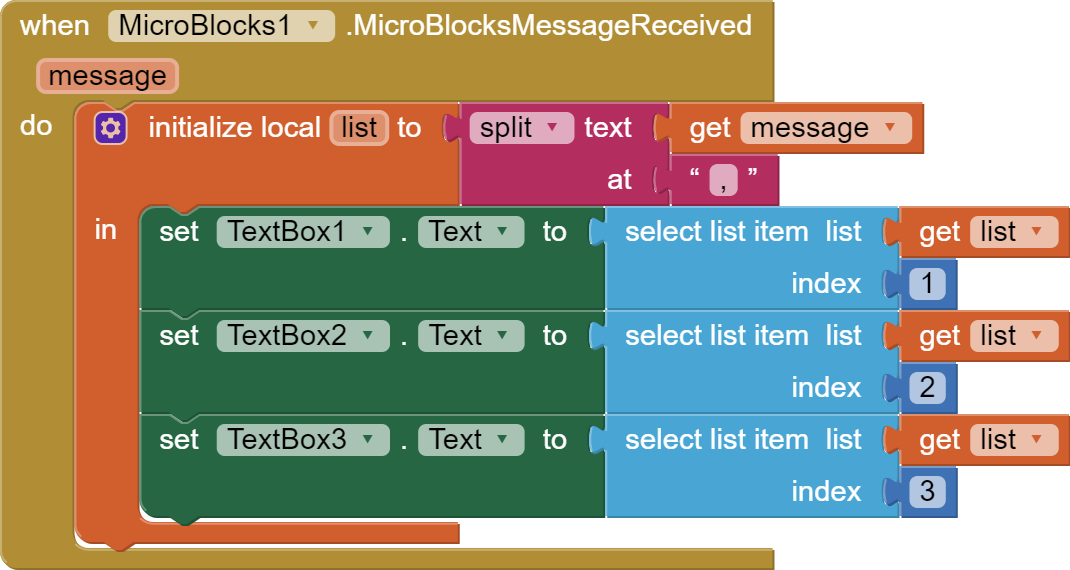
MicroBlocks is sending a SINGLE message with THREE values: "tilt x", "tilt y", "tilt z". These are received by the AI2 APP in the message parameter. message parameter is parsed by splitting the message at "," (comma) occurrences, producing a list with three values.
| MicroBlocks Script | AI2 Script |
|---|---|
 |
 |
Receive a message containing a label and a value from the microcontroller
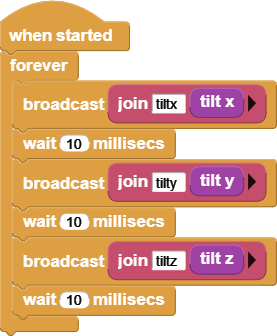
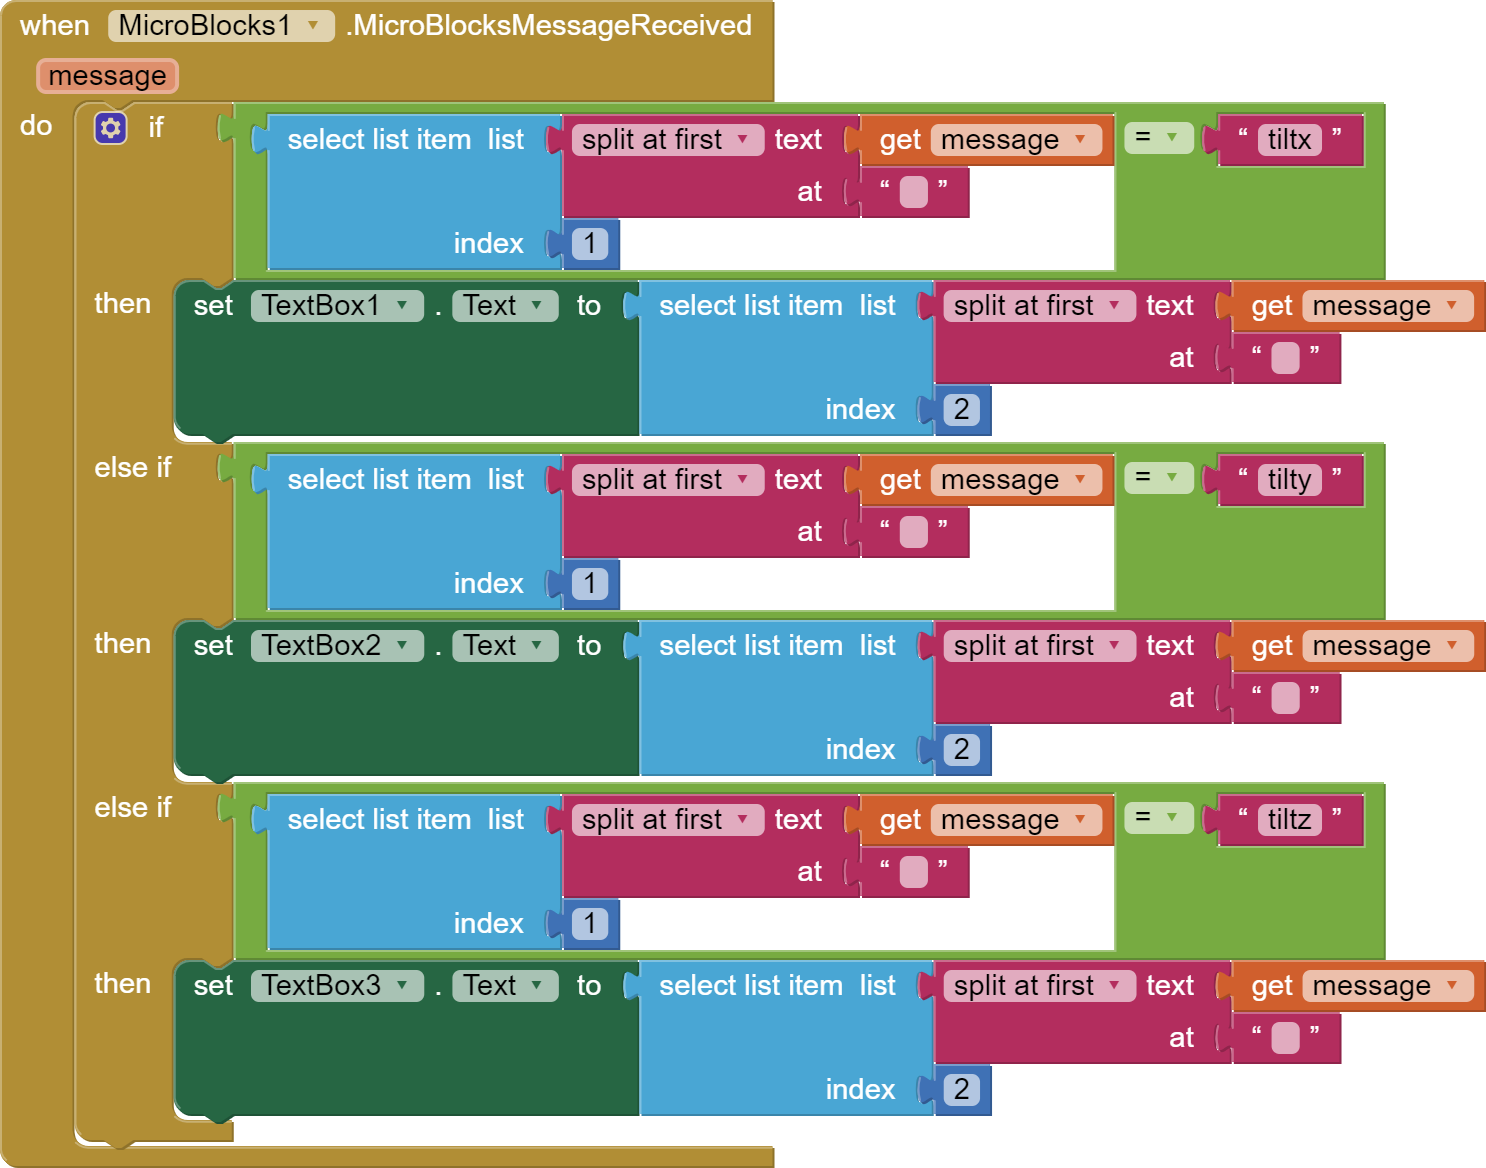
MicroBlocks is sending three messages, each containing a name and a value for: "tilt x", "tilt y", "tilt z". These are received by the AI2 APP in the message parameter. message parameter is parsed by splitting the message at " " (space) occurrences, producing a list with two items: name of the data item and the value.
NOTE: Each message sent from MicroBlocks will cause the MicroBlocksMessageReceived block to execute. Each execution will parse the incoming message and display the corresponding content.
| MicroBlocks Script | AI2 Script |
|---|---|
 |
 |