¶ Overview
Adafruit CLUE is a micro:bit compatible board with many features that differentiates it from the basic model. Foremost among these is the 240x240 pixel color TFT display.
This project is a maze game, where a sprite is made to navigate a maze, controlled by using the tilt sensors of the CLUE board. The player can choose one of two mazes, control the sprite movement speed with the A and B buttons, and try to navigate the maze in the shortest time possible.
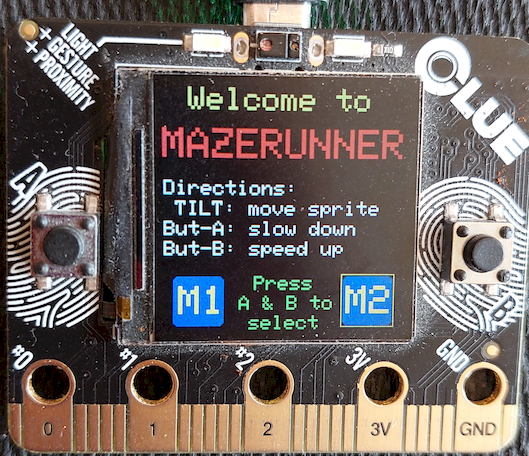
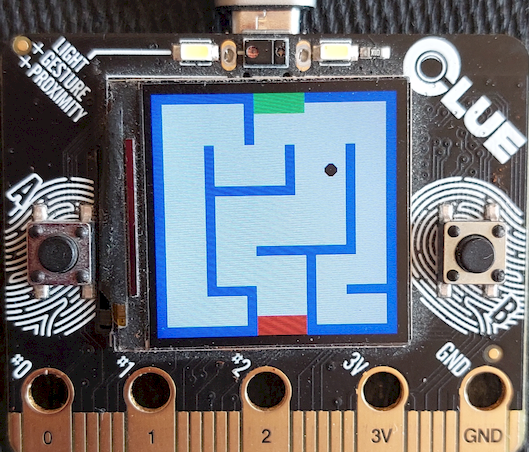
The project incorporates sensor use, maze design & display, navigation, and collision detection, in addition to basic game loop and event detection logic.
¶ Scripts
There are two mazes incorporated into the game:
| Maze1 (M1) | Maze2 (M2) |
|---|---|
 |
 |
The maze information is captured in a list-of-lists structure. Each maze's list consists of three lists:
List 1: horizontal walls - stored as starting X, starting Y, and length
List 2: vertical walls - stored as starting X, starting Y, and height
LIst 3: starting (green) and ending (red) rectangles - stored as top left X and Y, width, height, color
The pictures above annotate the horizontal (black numbers) and vertical (blue numbers) lines that make up the maze walls. Maze wall encodings can be seen stored in the M1 and M2 variable blocks.
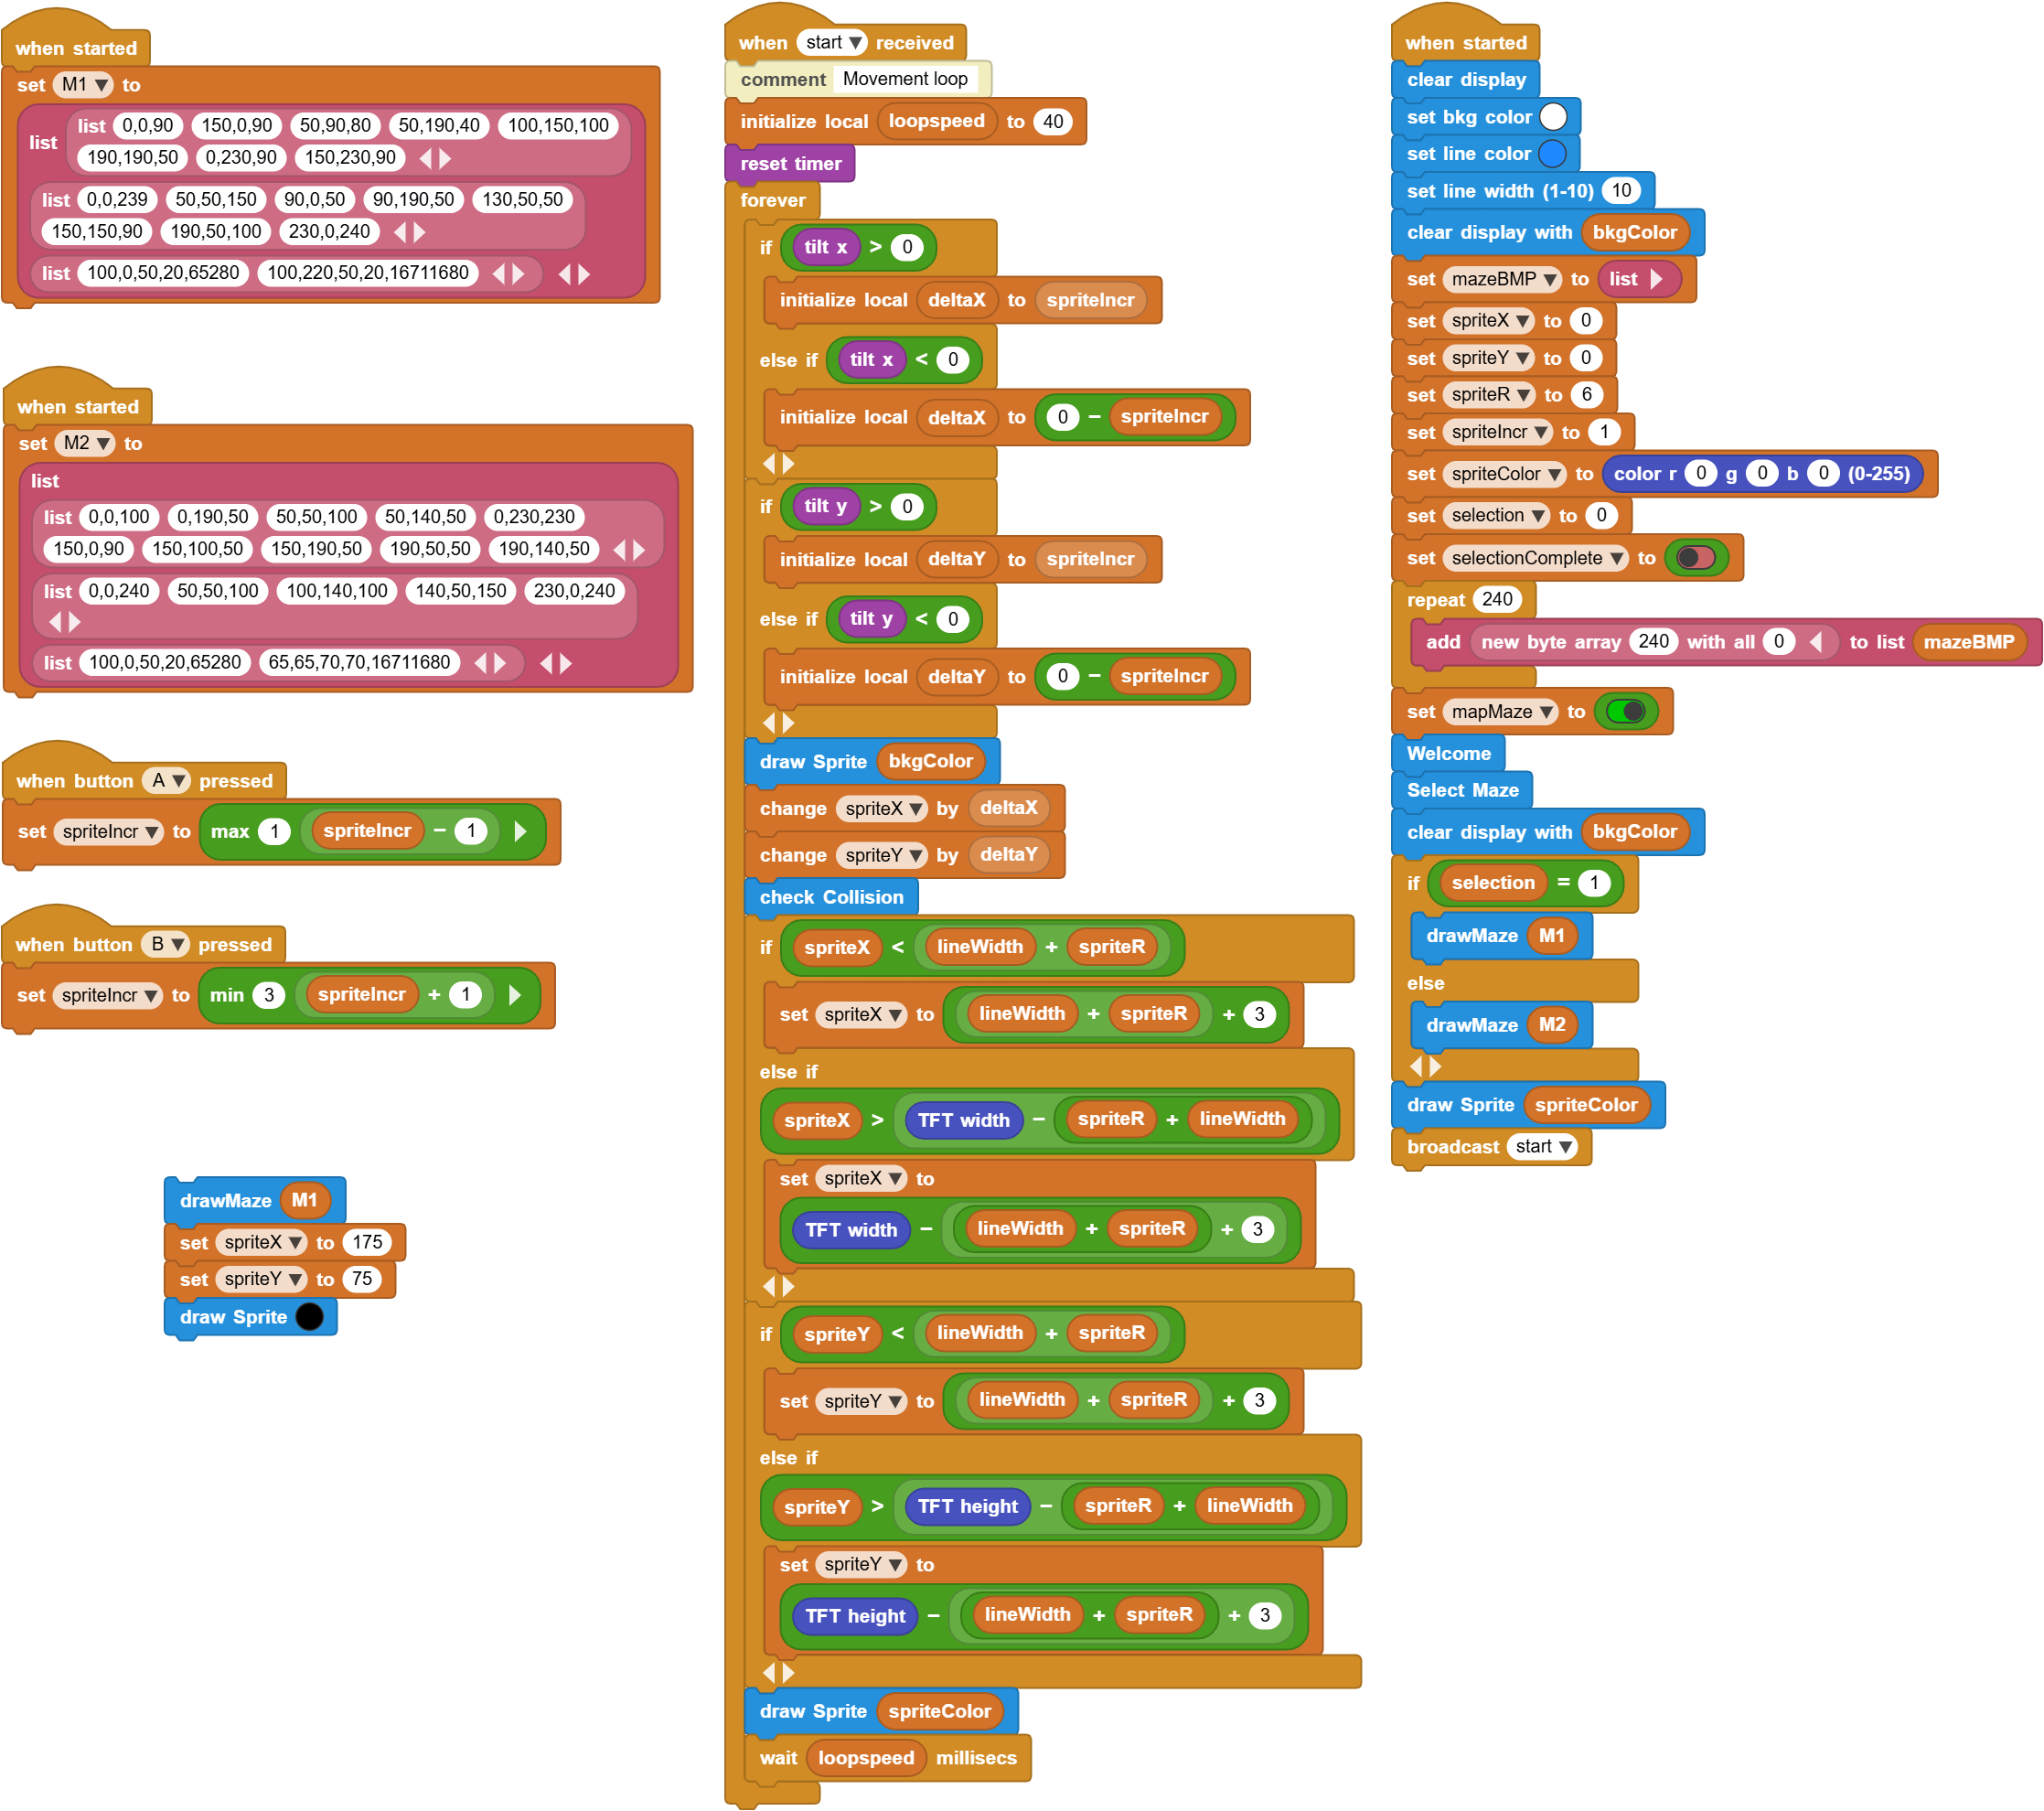
The lengthy when started block sequence initializes all the variables and runs through the opening maze selection sequence. The player can tilt the board left and right and highlight one of the two maze names with a yellow border. When the selection is final, press of the A&B buttons records the maze choice, displays it, and starts the game by broadcasting a start message.
when start received block sequence is the main game loop. After setting a default sprite speed, it starts looping through the process of checking the tilt sensor readings, verifying if there has been any collisions with the walls, and adjusting the sprite location accordingly. To prevent the sprite from exiting the screen boundaries, a TFT boundary check is done as well.
In cases of collisions with the walls, a short tone is played to warn the player. The sprite is made to bounce back a few pixels.
When the player successfully reaches the end zone (red rectangle), a short melody is played to indicate the end of the game, and the number of seconds spent getting to the end zone is displayed. The game will automatically loop to play the same maze selection. If another maze selection is desired, the Reset button has to be used to start the game from the beginning.
The speed of the sprite is controlled by the A&B buttons. Button A reduces the speed and button B increases it. Allowing for an adjustment between 1-3, it adds a level of complexitity to the game.
¶ Process
¶ Sprite movement
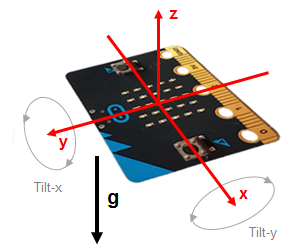
The movement of the sprite is achieved by reading the tilt x and tilt y values provided by the accelerometer.
  |
 |
|---|
These values range from -100 to 100, negative values indicating leftward and upward tilts, and positive values indicating rightwards and downwards tilt. Instead of using the entire range of the values, we only focus on the positive and negative aspects to move the sprite accordingly.
¶ Collision detection
The most critical design of the game involves the detection of the collisions with the walls. Since the TFT library blocks do not provide for reading the location of the screen content, we had to come up with a way to figure out where the walls are and if the sprite has collided with them.
To achieve this we have created a 240 element list (mazeBMP), where each element stores a 240 byte bytearray. This gives us enough space to store the entire screen in bitmap format. As the maze is drawn by the program, each wall pixel location, marked by a value of "1" is stored in this array. Alll the spaces are marked by the value "0".
Once we have this virtual bitmap of our screen, we can easily verify any collisions with the walls. We are able to check the locations of the sprite against the bitmap and determine if we are overlapping any positions with a "1" in it. This indicates a collision. Otherwise, everything is fine and the game continues.
Let's examine the collision detection process a bit more in details.
If we examine an enlarged version of our screen with representative walls and our sprite, we can better understand the task at hand.
![]()
Our sprite is a black circle. To make the detection process a bit easier, we define a bounding-box for this circle, which is shown in BLUE in the picture. The sprite location representated by the spriteX and spriteY variables, is at the center of this box. Further more, the radius of our sprite is defined by the spriteR variable, and represents half the length of the bounding box.
Using these pieces of information, we are able to determine the starting and ending locations of the bounding box in terms of x and y coordinates within the mazeBMP list. We simply store the bit values making up the four sides into another variable called the collisionList.
Every time the sprite moves to a new location, we quickly calculate the bounding box bits and check for the presence of any value "1"s, representing the walls.

If the result is other than a -1 (not found), it indicates a collision; and we go ahead an process our collision logic. Otherwise, the game continues.
¶ End of game
There is one other special kind of collision that we have to account for: the arrival of the sprite at the end point, marked with a RED rectangle. This set of bits are stored in our mazeBMP using the value "9". While the value "9" is totally arbitrary, it does have to be different that the other value "1". So, besides checking for the presence of 1's, we also have to check for the presence of 9's to determine if the sprite has reached the end point.

If the result is other than a -1 (not found), it indicates a the sprite is at the end zone; and we go ahead and process our game end logic. Otherwise, the game continues.
¶ Other functions
We'll let you examine and explore the details of the other custom blocks in the program. For example, we have created special blocks to handle the drawing of the maze walls.


These are based on the TFT library blocks, but allow for simplified drawing of the walls and specification of the wall thicknesses.


You can also control the background color of the maze arena with the block below.


¶ Discussion
¶ Maze generation
While it is possible to create mazes by hand, it is easier to use a generator program. We have used one called Maze Generator that is web based and very easy to use.
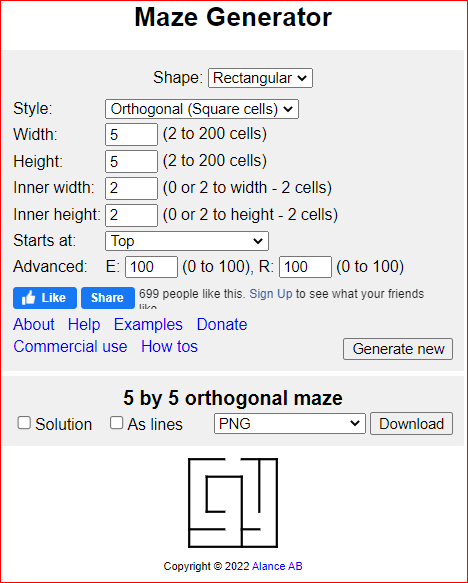
You can have infinite fun creating various mazes and incorporating them into your program.
Here are some suggested steps to create a maze:
- first use the program and generate one that you like
- use the Download feature to save it to your PC
- then use a paint program and load the maze PNG file (example uses MSPaint)
- using the Resize function of your paint program, adjust the size of the maze to 240x240 pixels and save it.
- then relable each line segment horizontally and vertically. You should end up with something that looks like this:
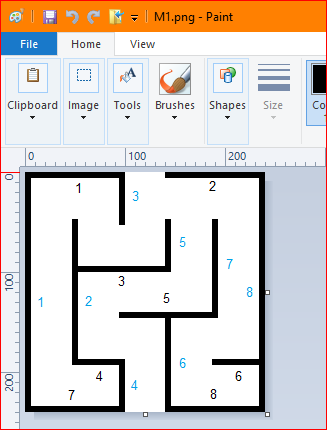
- at this point you are ready to encode your maze into the M1 or M2 maze variable in your program:
-- Simply enter the starting x,y coordinates and the lengths of each horizontal segment into the first list locations.
-- Repeat it for the vertical ones, but use the second list locations.
-- You can add and delete list locations to the M1 and M2 variables as your maze requires it.
-- Keeping the picture with the ruler display open will help you handle the coordinate numbers. The sequence of the line segments will not matter.
-- Finally, you enter the starting and ending point rectangles as the third list locations in the M1 and M2 list variables.
--The color of the last two areas can be calculated using the TFT color block. Make a color of your choosing and click the block to obtain the color number. Here is an example for the color YELLOW:

¶ Program Enhancements
This is a very simple game program. It does not even have any features to keep score.
Here are some potential game improvements:
- How would you incorporate a scoring system?
- Maybe wall collisions could be penalized.
- Or faster speeds can be awarded.
- Or a timer could limit the play for any round.
Enjoy the project.